Free Crochet Dragon Pattern: Cute No-Sew Plush Dragon
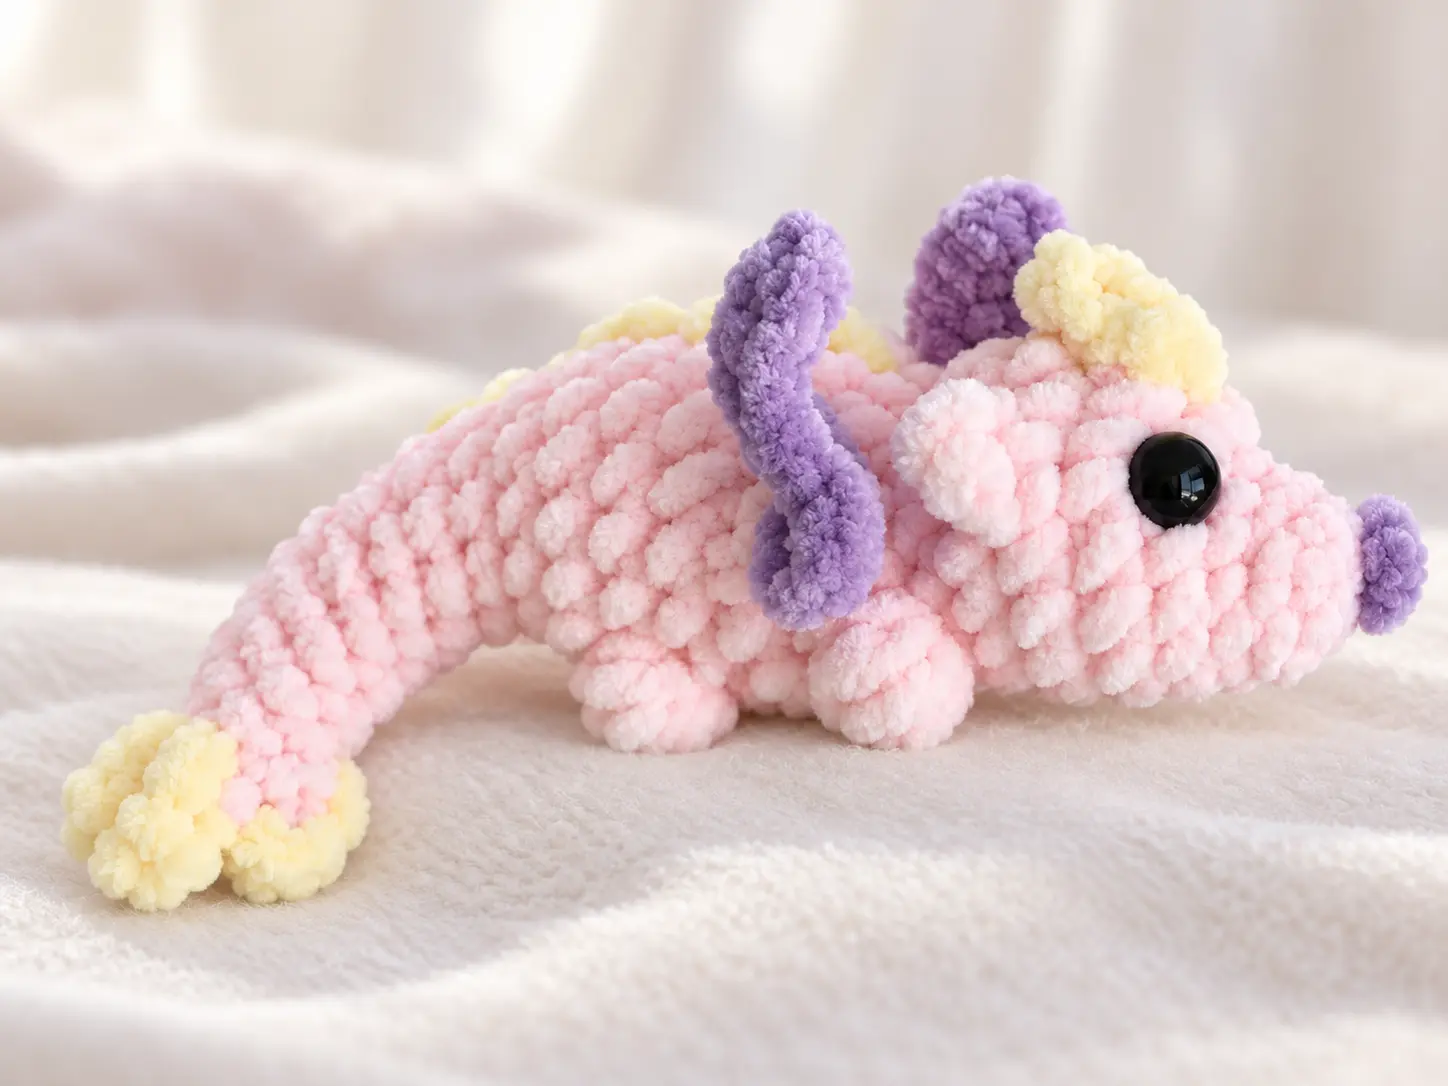
Follow this free crochet dragon pattern to make a colorful no-sew plush dragon with integrated wings, ears, legs, and decorative spikes.
This pattern is worked from the head to the tail in continuous spiral rounds. It uses super bulky chenille yarn and includes color changes, bobble stitches, and front-loop/back-loop techniques.
Pattern at a Glance
| Detail | Information |
| Skill Level | Advanced Beginner |
| Crochet Terminology | US Terms |
| Yarn | Super Bulky Chenille |
| Hook Size | 4.0 mm |
| Safety Eyes | 12 mm |
| Main Colors | Pink, Purple, Yellow |
| Construction | One continuous piece |
| Assembly | No sewing required for attaching parts |
| Finished Size | Depends on yarn and tension |
Is This Dragon Pattern Beginner-Friendly?
This project is best suited to advanced beginners who are comfortable with single crochet, increases, decreases, and basic color changes. Familiarity with front-loop-only (FLO) and back-loop-only (BLO) techniques is helpful, especially when creating the ears and wings.
The most challenging step is creating the wings directly into the body during Round 10. Each wing is worked into the front loop of one body stitch, while its back loop is reserved for Round 11.
Tip: Mark the unused back loop before starting each wing. This will help you locate the correct stitch when continuing the body.
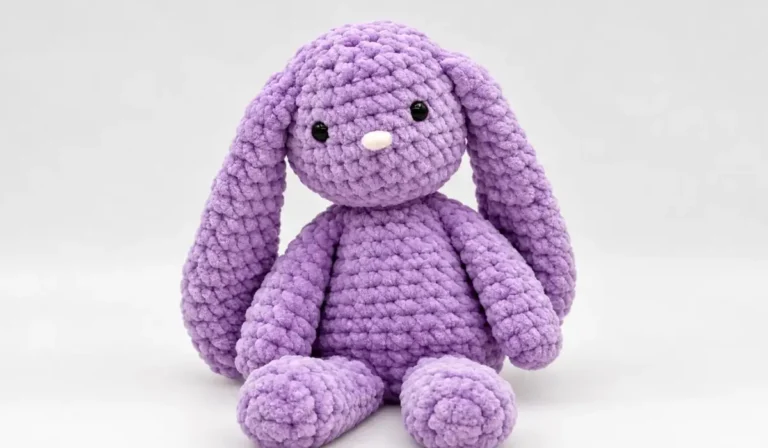
If you’re new to amigurumi, practice working into front and back loops before starting this project.If you enjoy no-sew amigurumi projects, you can also explore our no-sew bunny crochet pattern for another cute handmade plush.
Materials & Tools for the No-Sew Dragon
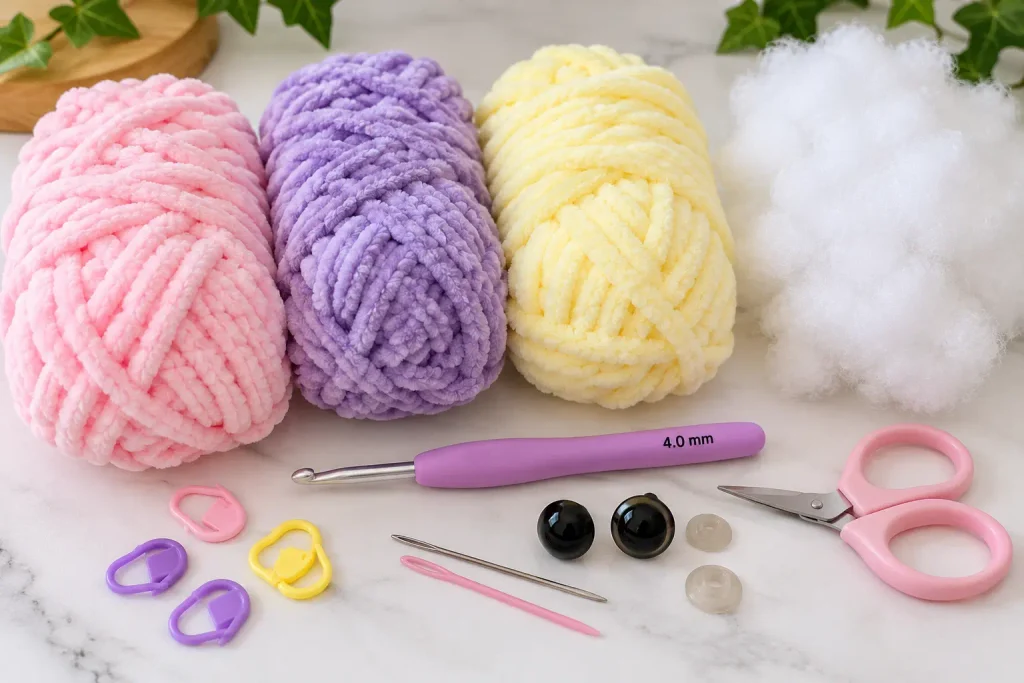
Before starting this dragon crochet pattern, gather the materials and tools listed below. You’ll need three shades of chenille yarn to create the body, wings, and decorative spikes.
Yarn & Materials
| Material | Details |
| Super Bulky Chenille Yarn | Pink for the main body, purple for the wings, and yellow for the horn and back spikes |
| Crochet Hook | 4.0 mm |
| Safety Eyes | 12 mm, one pair |
| Polyester Fiberfill | For stuffing the head, body, and tail |
| Stitch Markers | For marking the beginning of rounds and the reserved back loops |
| Tapestry Needle | For weaving in yarn ends |
| Scissors | For cutting yarn |
You can substitute another yarn weight, but choose a compatible hook size and expect the finished dragon’s dimensions to vary.
Choosing Your Colors
The original dragon combines a soft pink body with purple wings and cheerful yellow spikes. You can keep this color combination or create your own version using complementary colors.
For the best results, choose yarns of similar weight and texture so the stitches remain consistent throughout the project.
Before You Start
Make sure you have enough yarn available for the entire project, especially your main body color. The original tutorial does not specify exact yarn quantities or finished dimensions.
Helpful Tip: Keep several stitch markers nearby. You will need them not only to track your rounds but also to identify the unused back loops when creating the ears and wings.
Safety Note: Plastic safety eyes can pose a choking hazard if detached. For toys intended for babies or very young children, embroidered eyes are a more appropriate alternative.
Crochet Abbreviations & Stitch Guide
This no-sew dragon pattern uses US crochet terminology. Familiarize yourself with the following abbreviations before beginning.
| Abbreviation | US Crochet Term | Meaning |
| MR | Magic Ring | An adjustable loop used to begin crocheting in the round |
| sc | Single Crochet | A basic crochet stitch |
| inc | Increase | Work 2 sc into the same stitch |
| dec | Decrease | Combine 2 stitches into 1 |
| ch | Chain | A stitch used to create chains and decorative shapes |
| dc | Double Crochet | A taller stitch used to create the dragon’s decorative spikes |
| st / sts | Stitch / Stitches | Refers to individual crochet stitches |
| BO | Bobble Stitch | A raised decorative stitch used to form the dragon’s legs |
| BLO | Back Loop Only | Work into the back loop of a stitch |
| FLO | Front Loop Only | Work into the front loop of a stitch |
| sl st | Slip Stitch | A stitch used to join or finish the work |
Special Techniques Used in This Pattern
Continuous Spiral Rounds
The dragon is crocheted in continuous rounds without joining each round with a slip stitch. Use a stitch marker to identify the first stitch of every round.
Front Loop Only (FLO) and Back Loop Only (BLO)
The ears and wings are formed in the front loops of selected body stitches, while the unused back loops are reserved for the following round. This technique keeps the decorative features attached without sewing.
This method creates the dragon’s decorative features without sewing them on separately.
Bobble Stitch (BO)
Bobble stitches create the raised details that form the dragon’s legs. Follow the five-loop bobble technique shown in the original tutorial consistently to keep these details even.
Double Crochet (dc) vs. Decrease (dec)
Be careful not to confuse these two abbreviations:
- dc means double crochet, used for the yellow back spikes.
- dec means decrease, used to narrow the head, body, and tail.
Color Changes
For a clean color transition, work the final yarn-over of the preceding stitch using the new yarn color. This helps create neatly defined wings, horns, and back spikes.
Reading Stitch Counts
Numbers in square brackets, such as [12] or [16], indicate the intended number of main-body stitches or stitch positions at the end of a round.
Decorative chains and stitches used to form the ears, wings, and horns are not counted as additional main-body positions.
How to Crochet the No-Sew Dragon – Step-by-Step Pattern
This free crochet dragon pattern is worked in continuous spiral rounds, starting with the head and finishing at the tail. The ears, wings, legs, and decorative spikes are incorporated as you crochet, so there is no need to sew separate pieces together.
The pattern uses US crochet terminology and is best suited to advanced beginners who are already comfortable with basic crochet stitches, increases, decreases, and color changes.
Before You Begin
- Work in continuous spiral rounds unless otherwise instructed.
- Place a stitch marker at the beginning of each round.
- Use pink chenille yarn as your main color, yellow for the horn and back spikes, and purple for the wings.
- Numbers in square brackets indicate the intended stitch count of the main body round.
- When creating decorative features in the front loop of a stitch, keep the unused back loop available for the next round.
- Complete color changes during the final yarn-over of the preceding stitch for a cleaner transition.
Special Stitch Note: BO refers to the bobble stitch demonstrated in the original tutorial, using five loops on the hook. Follow the demonstrated method when forming these raised details.
As you follow this no-sew dragon crochet pattern, keep track of the reserved back loops when forming the ears and wings. You will work into those loops in the following rounds.
Part 1: Head & Face (Rounds 1–9)
Begin with your pink chenille yarn and a 4.0 mm crochet hook.
Round 1: Work 8 sc into a magic ring. [8]
Round 2: Sc in each stitch around. [8]
Round 3: 2 sc, 4 inc, 2 sc. [12]
Round 4: 4 sc, 4 inc, 4 sc. [16]
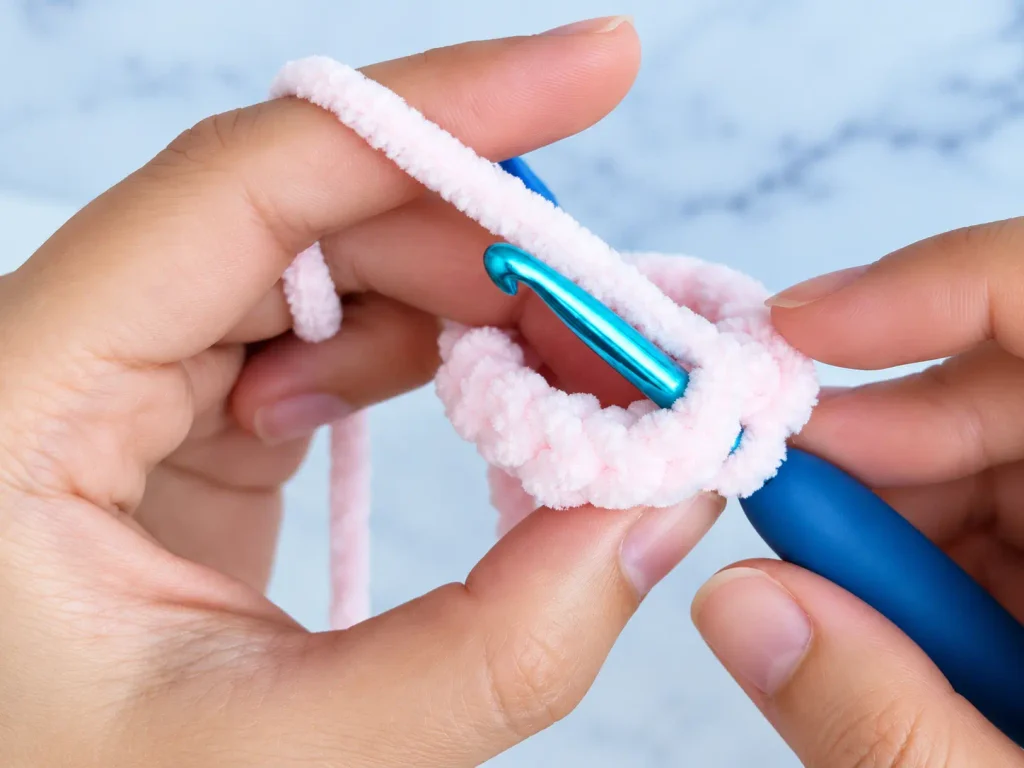
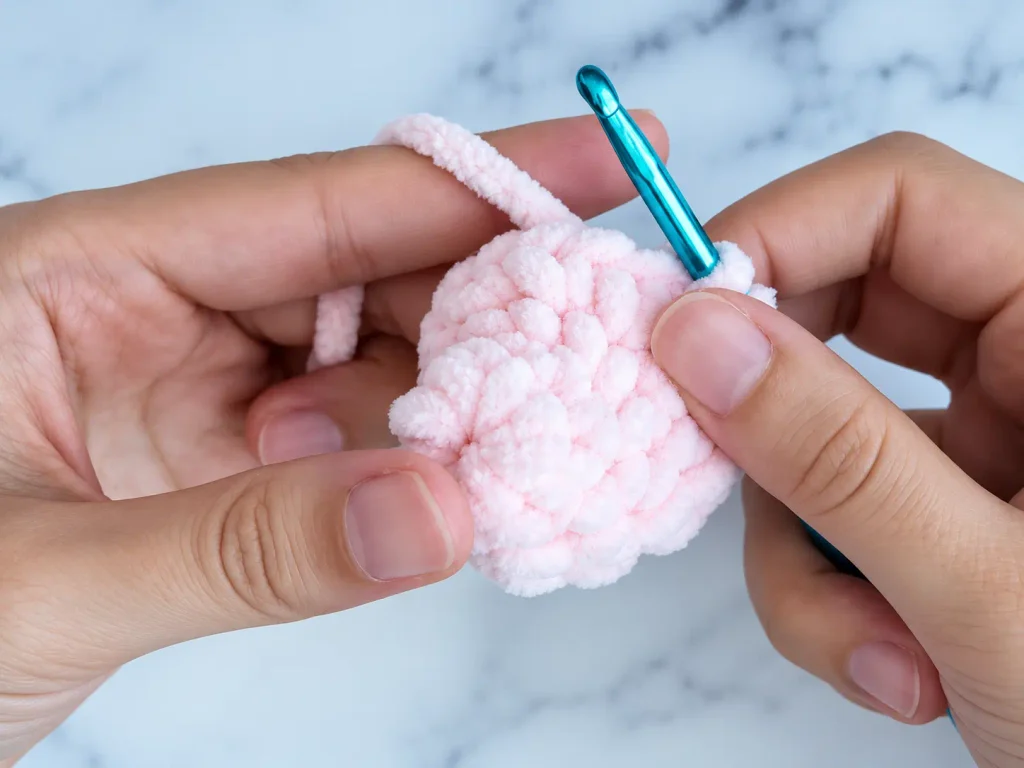
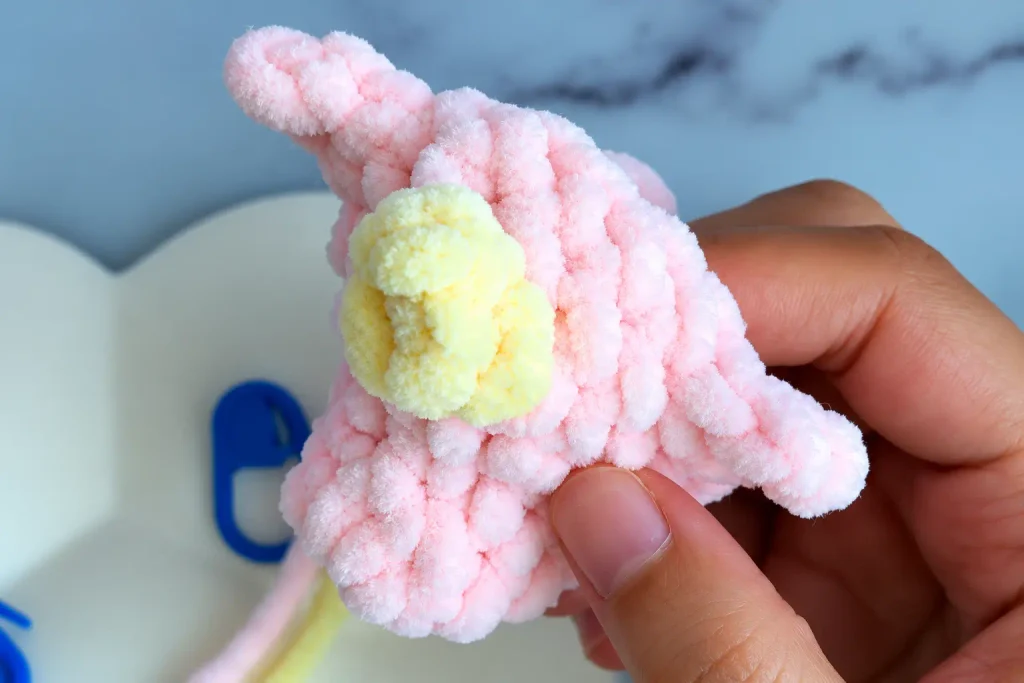
Round 5 – Creating the Head Horn
Work 7 sc, changing to yellow yarn while completing the seventh stitch.
In the next stitch:
- Work 2 dc into the same stitch.
- Ch 2.
- Work another dc into the same stitch, changing back to pink before completing it.
- Gently enlarge the working loop and remove your hook.
- Insert your hook through the first dc, catch the working loop, and pull it through to form the horn.
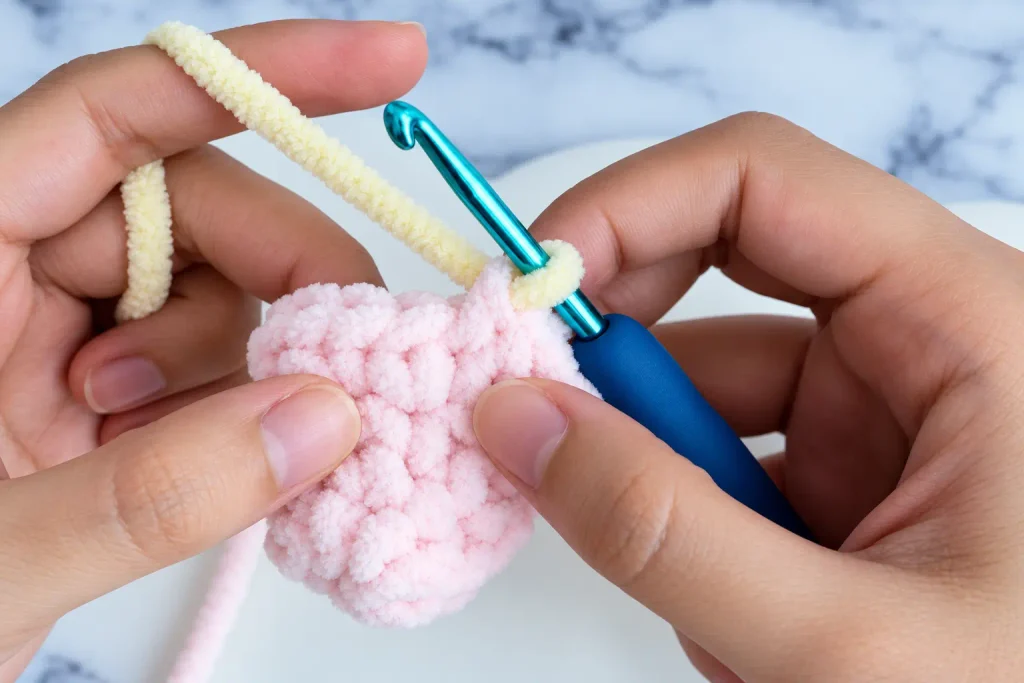
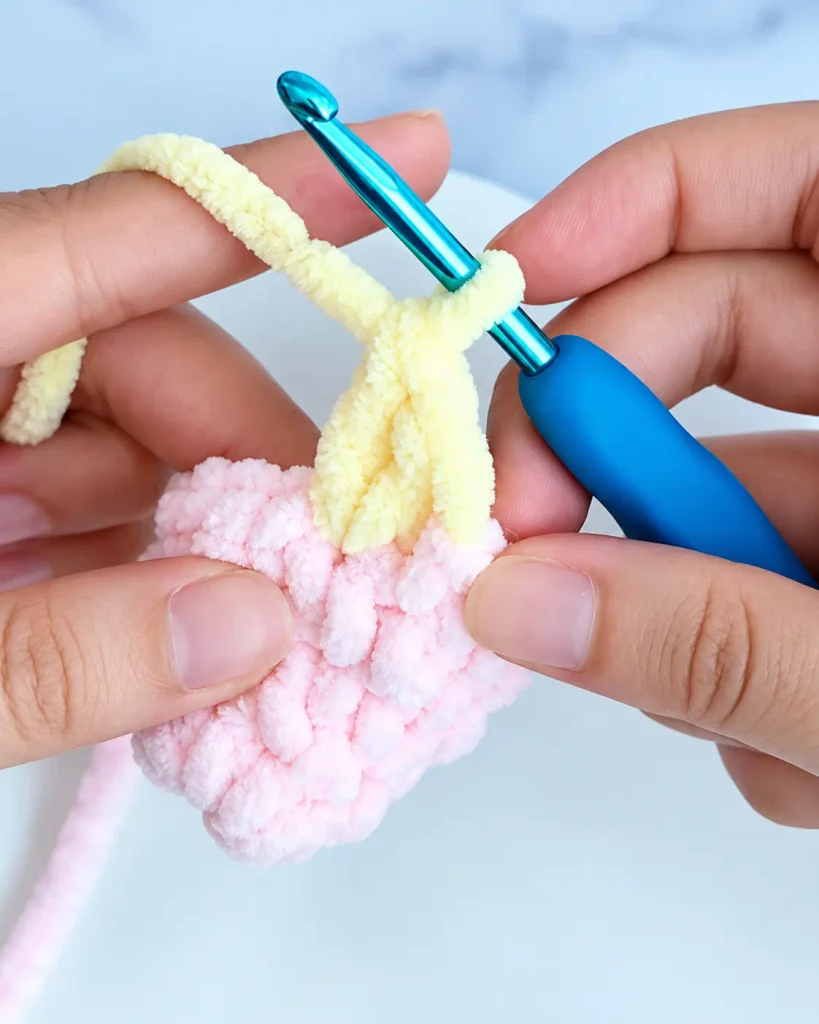
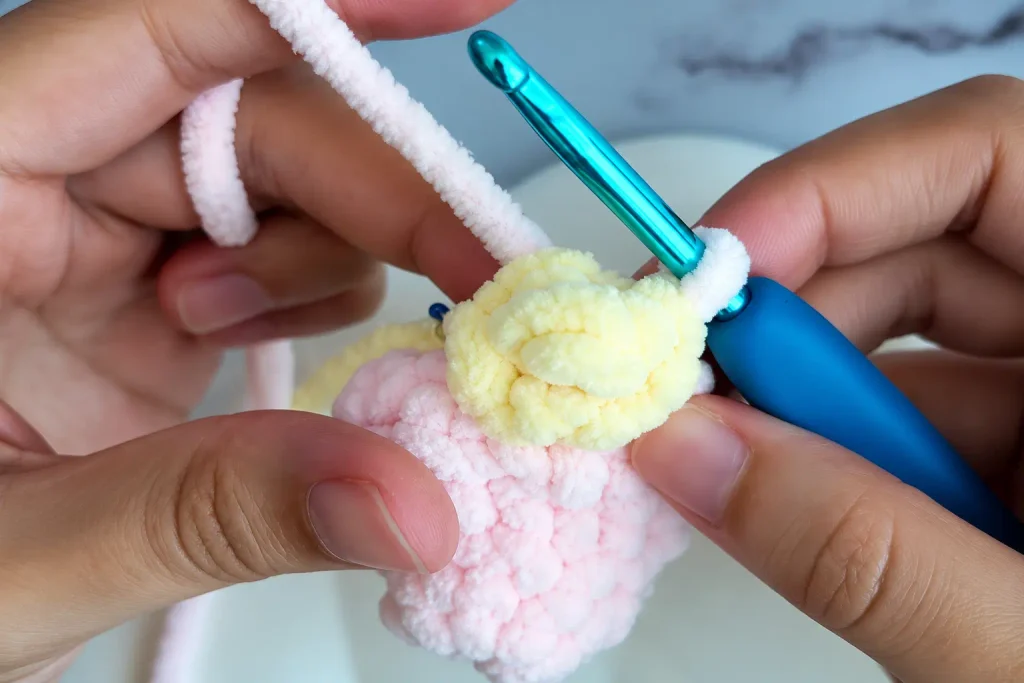
Continue with 8 sc to finish the round. [16 main-round positions]
The horn is formed as a decorative feature within one position of the main round.
Round 6 – Creating the Ears
Work 4 sc.
First Ear
- Place a stitch marker in the back loop of the next stitch.
- Work 1 FLO sc into that stitch.
- Ch 2.
- Work 1 sc into the second chain from the hook.
- Work another FLO sc into the same stitch of the main round.
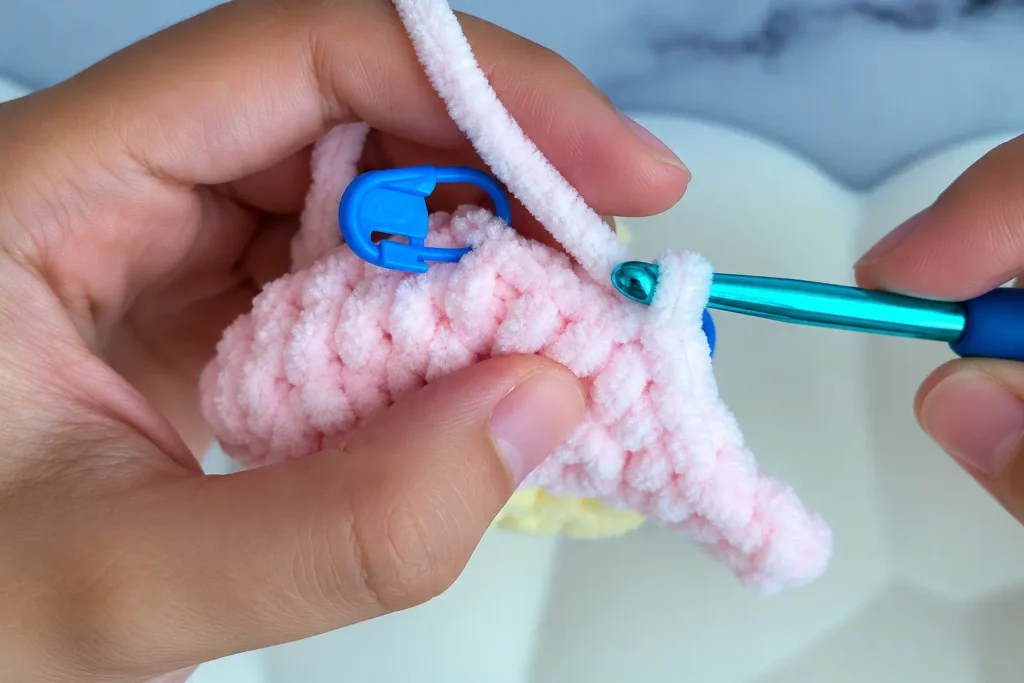
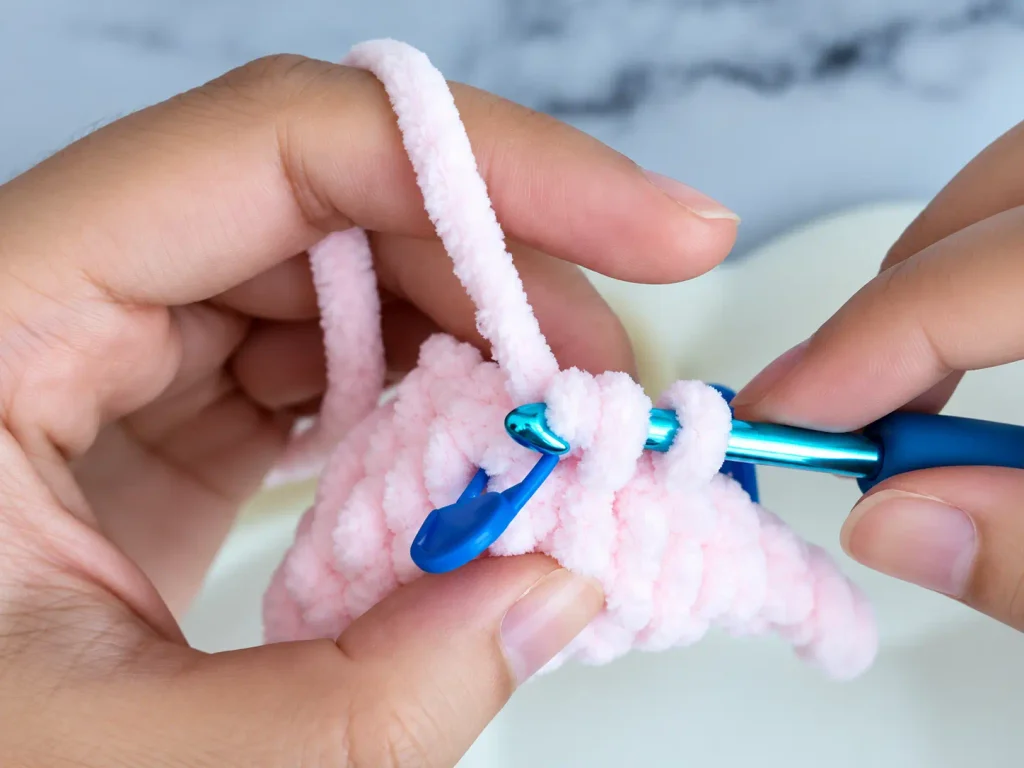
Continue with 5 sc.
Second Ear
Repeat the same ear instructions in the next stitch, marking its unused back loop before beginning.
Finish the round with 5 sc. [16 main-round positions]
Helpful Tip: Keep the stitch markers behind the ears until Round 7 is complete. This makes it easier to locate the correct back loops.
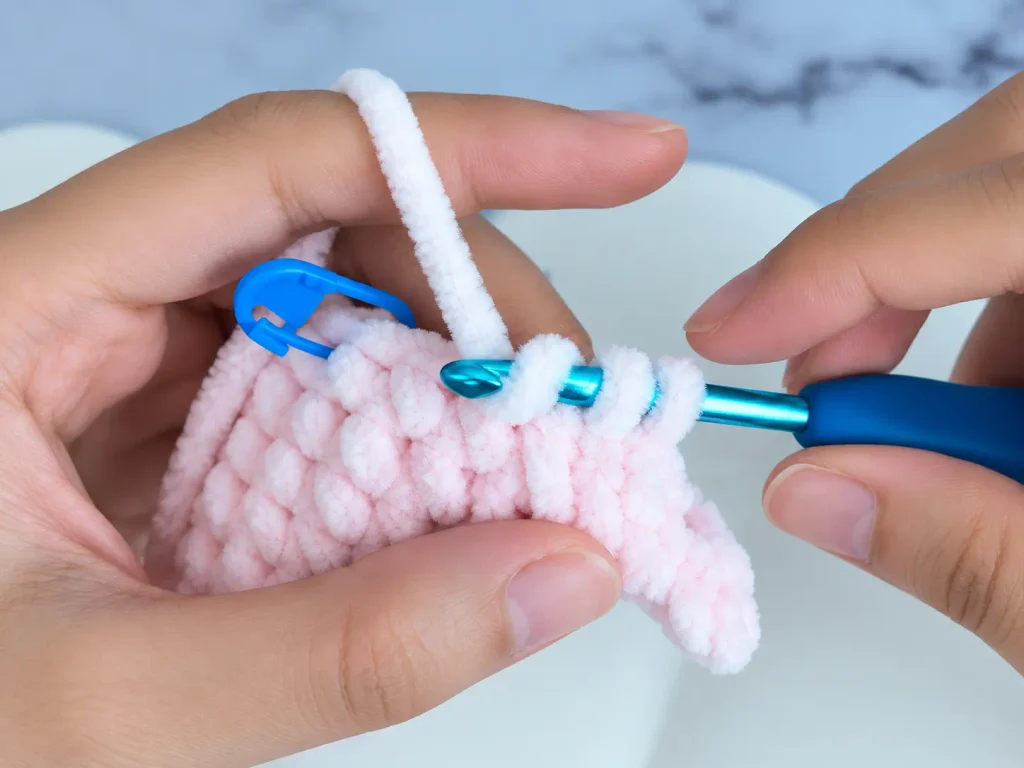
Round 7 – Continuing Behind the Ears
Round 7: 4 sc, 1 BLO sc, 5 sc, 1 BLO sc, 5 sc. [16]
Work each BLO sc into the back loop previously marked behind its corresponding ear.
Skip the protruding ear stitches rather than crocheting into them. This allows the ears to remain raised while the main body continues in a smooth spiral.
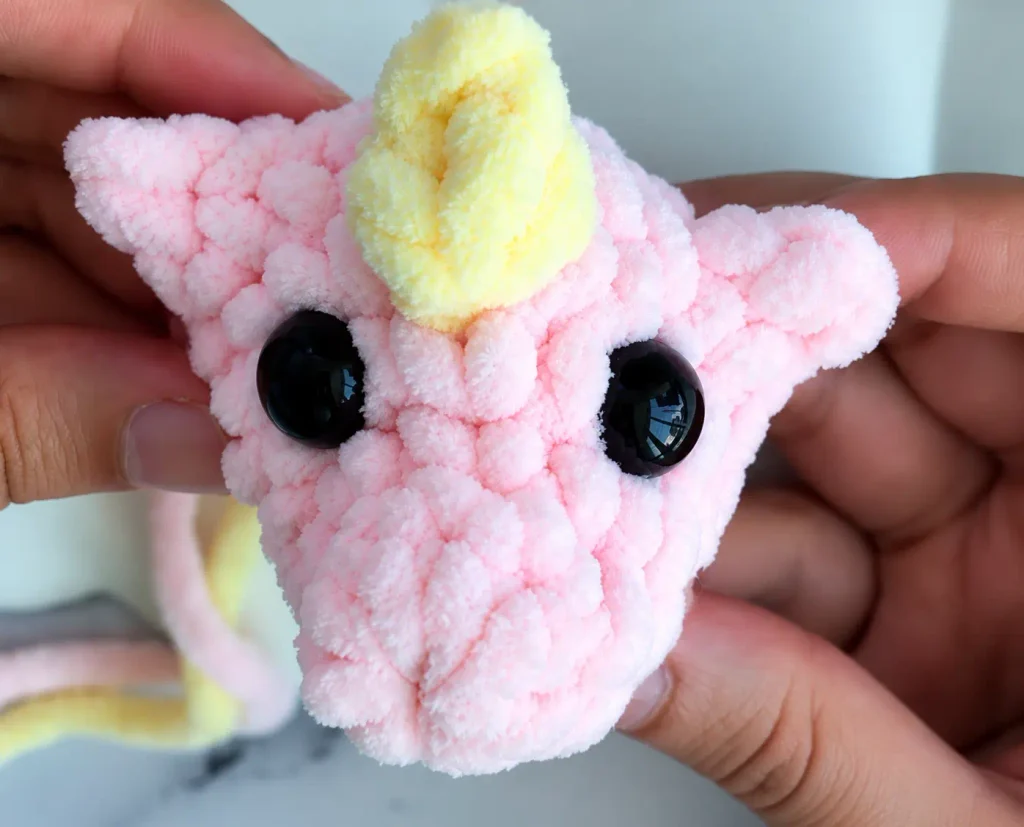
Placing the Safety Eyes
Insert the 12 mm safety eyes between rounds 4 and 5.
Check their position and symmetry before attaching the washers. Once the washers are secured, they can be difficult to remove.
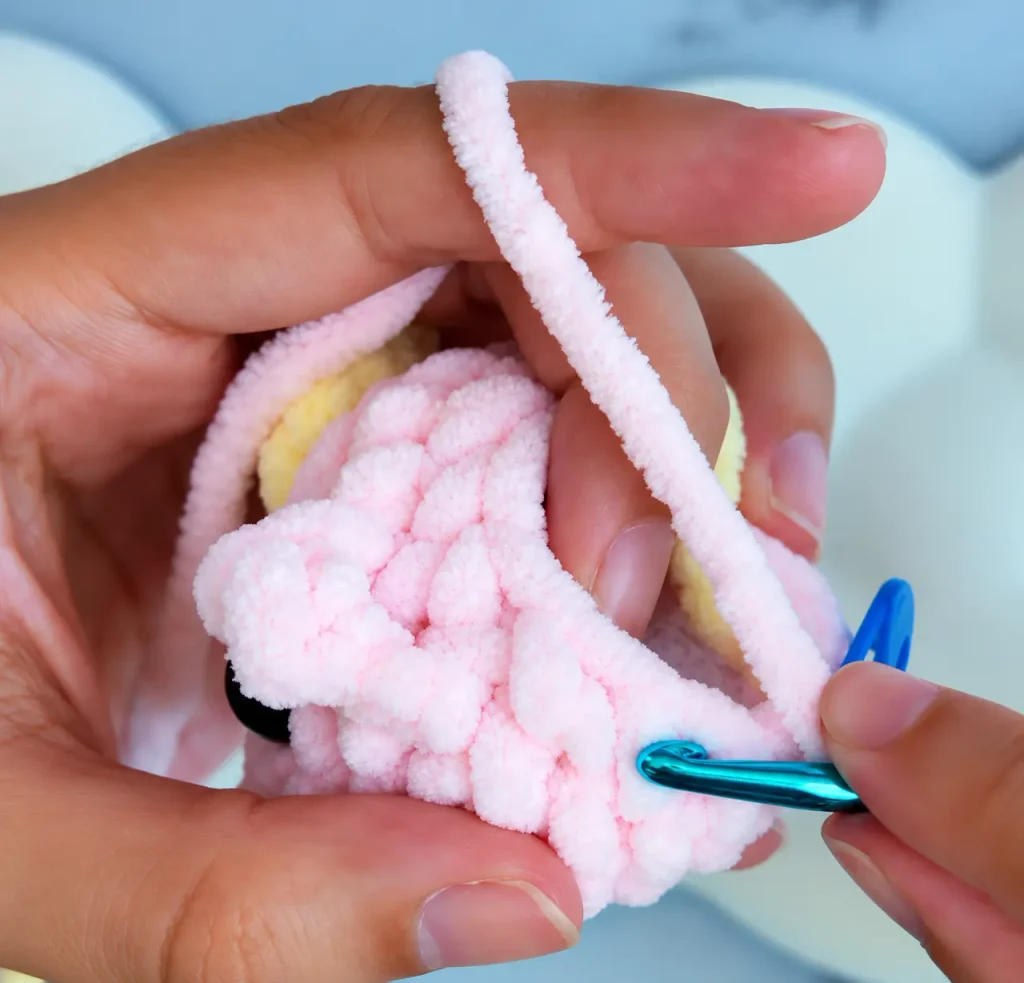
Round 8 – Shaping the Head
Round 8: (2 sc, dec) × 4. [12]
This round narrows the head.
Add polyester fiberfill, distributing it evenly to maintain a rounded shape without stretching the stitches.
Round 9 – Adding the First Bobble
Round 9: 10 sc, 1 BO, 1 sc. [12]
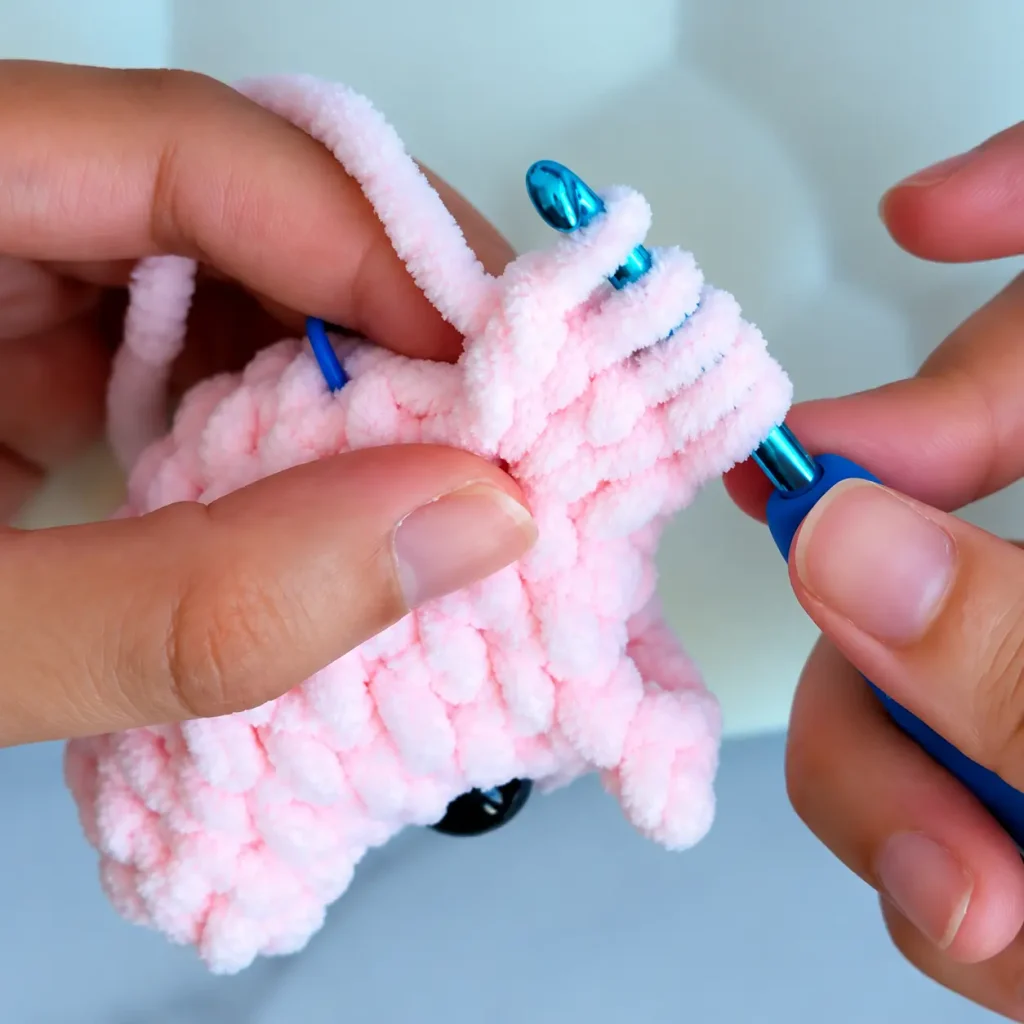
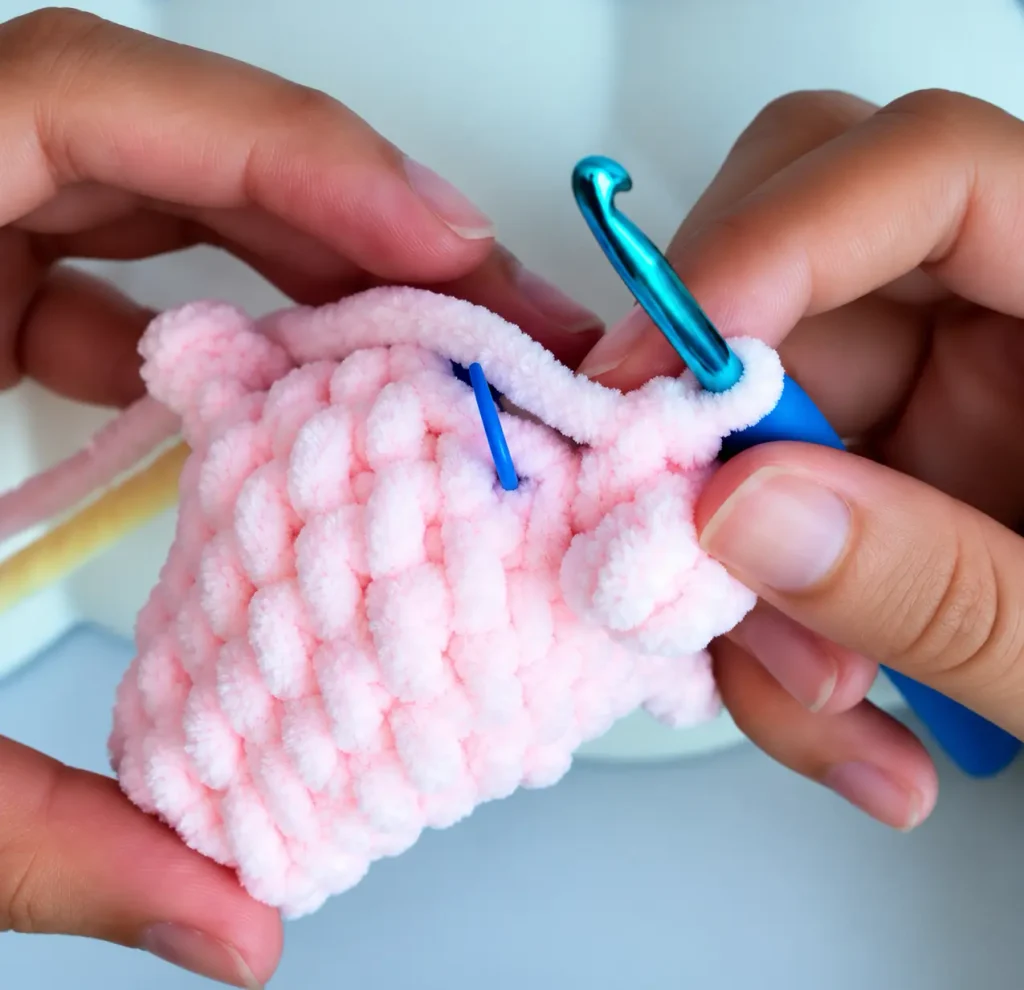
The bobble creates a raised detail as the project transitions from the head into the upper body.
Part 2: Wings & Upper Body (Rounds 10–11)
The wings are created directly into the dragon’s body using purple chenille yarn. Both wings are worked into the front loops of selected stitches, leaving the back loops available for the following round.
Round 10 – Creating Both Wings
Round 10: 1 sc, 1 BO, inc, 1 sc, Wing 1, inc, 1 sc, inc, Wing 2, inc, 2 sc. [16 main-round positions]
Begin with pink yarn.
Work 1 sc, 1 BO, inc, and 1 sc.
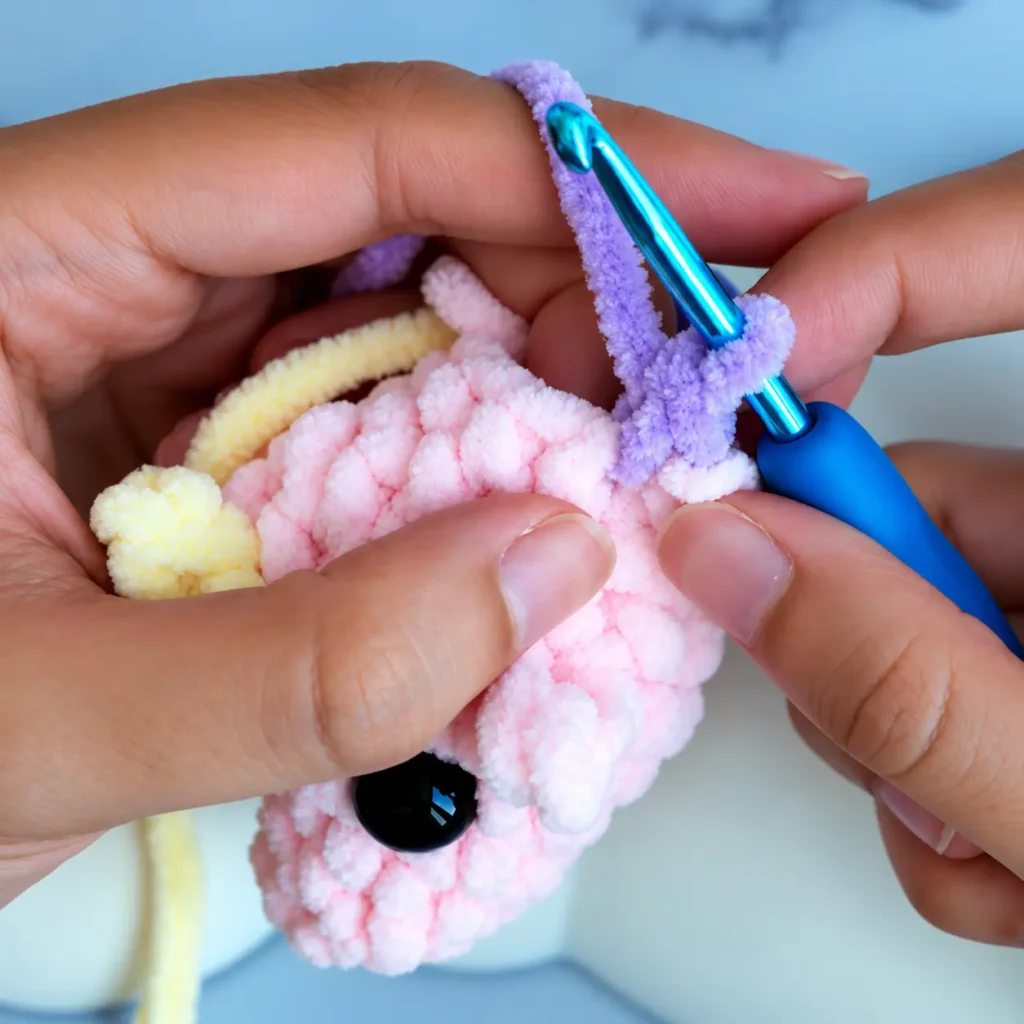
While completing the single crochet immediately before Wing 1, change to purple yarn.
Wing 1
- Place a stitch marker in the back loop of the next body stitch.
- Work 1 FLO sc into that stitch.
- Ch 4.
- Work another FLO sc into the same body stitch.
- Ch 5.
- Starting in the second chain from your hook, work 4 sc along the chain.
- Work another FLO sc into the same body stitch, changing back to pink before completing it.
Continue with:
- 1 inc
- 1 sc
- 1 inc
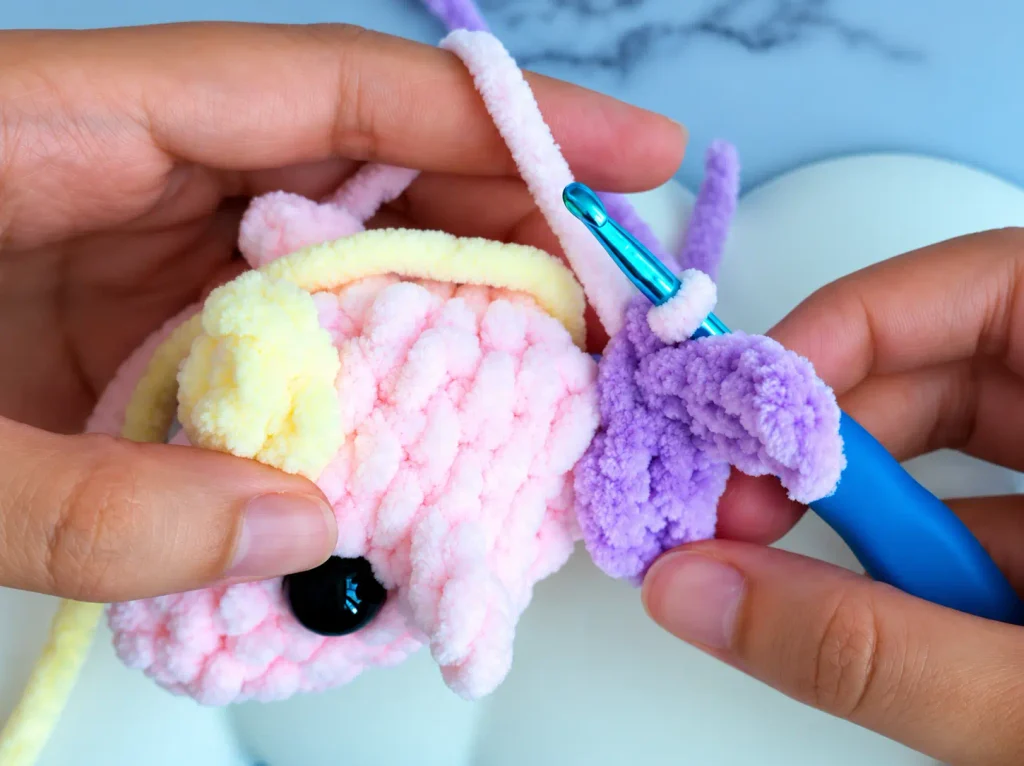
Change to purple while completing the last increase.
Wing 2
- Place a stitch marker in the back loop of the next body stitch.
- Work 1 FLO sc into that stitch.
- Ch 5.
- Starting in the second chain from your hook, work 4 sc along the chain.
- Work another FLO sc into the same body stitch.
- Ch 4.
- Work another FLO sc into the same body stitch, changing back to pink before completing it.
Finish Round 10 with 1 inc and 2 sc.
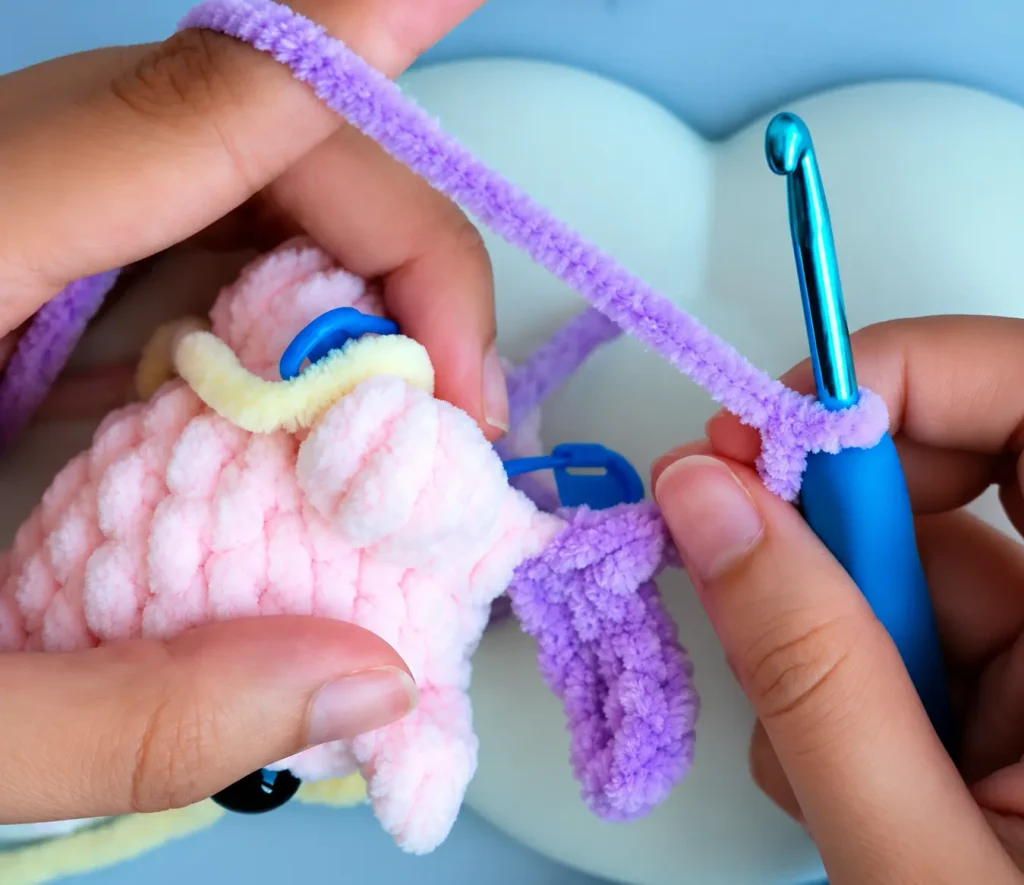
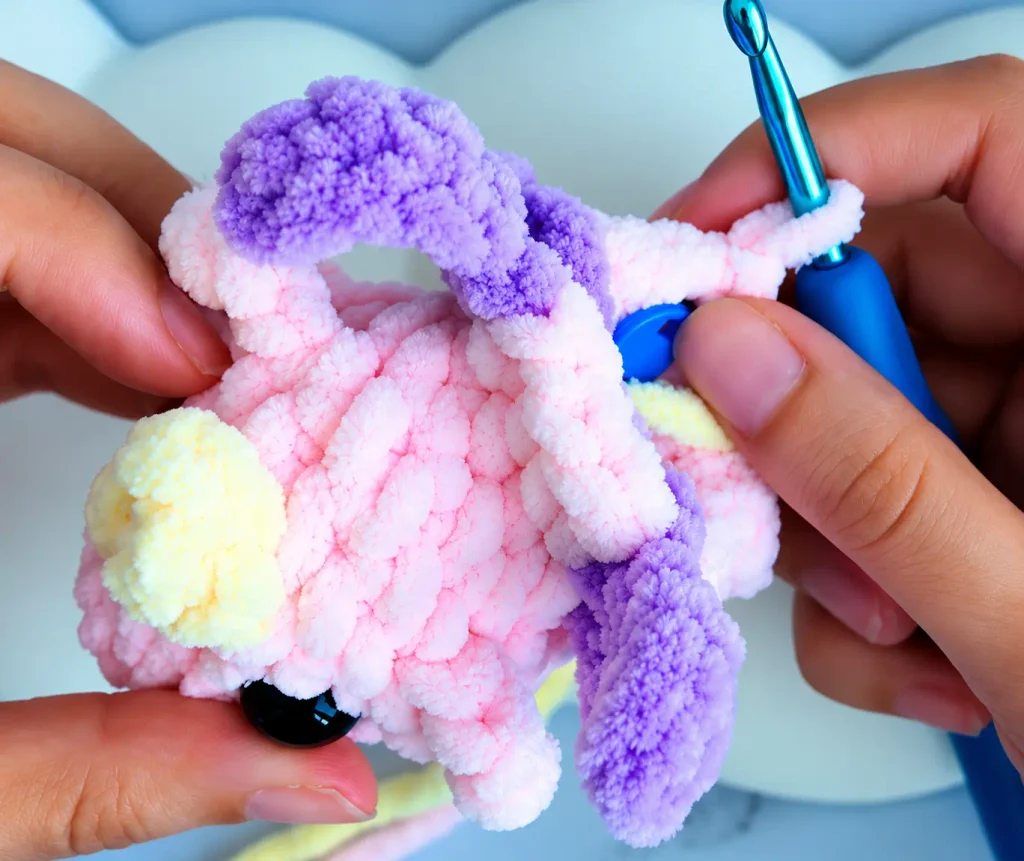
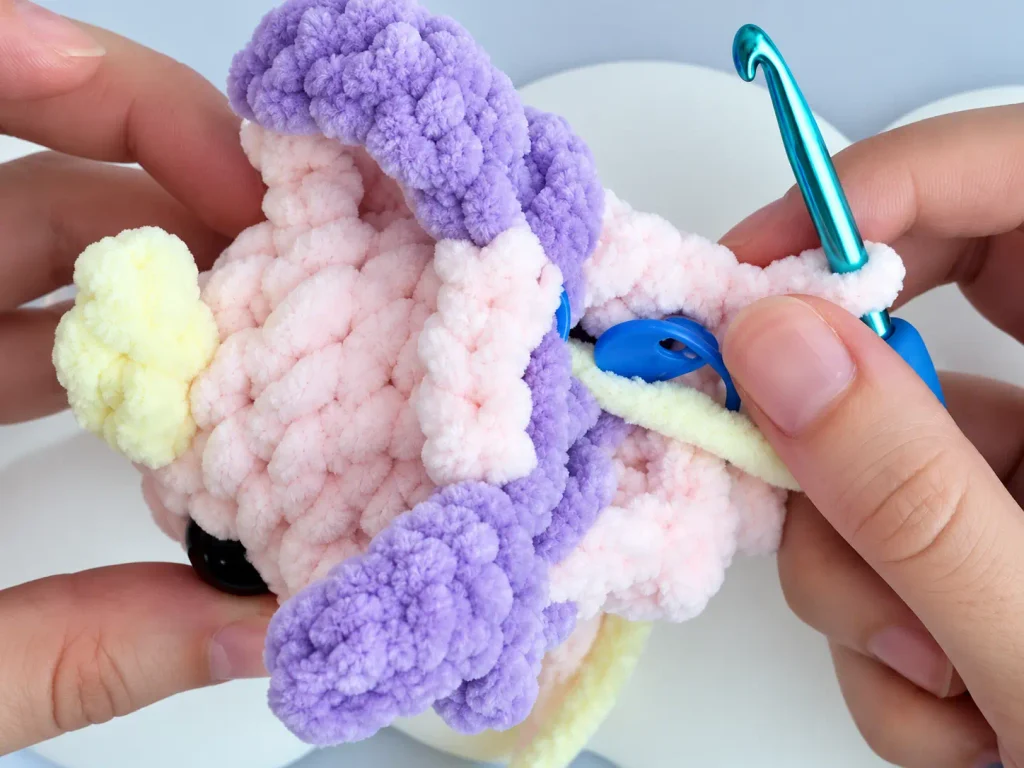
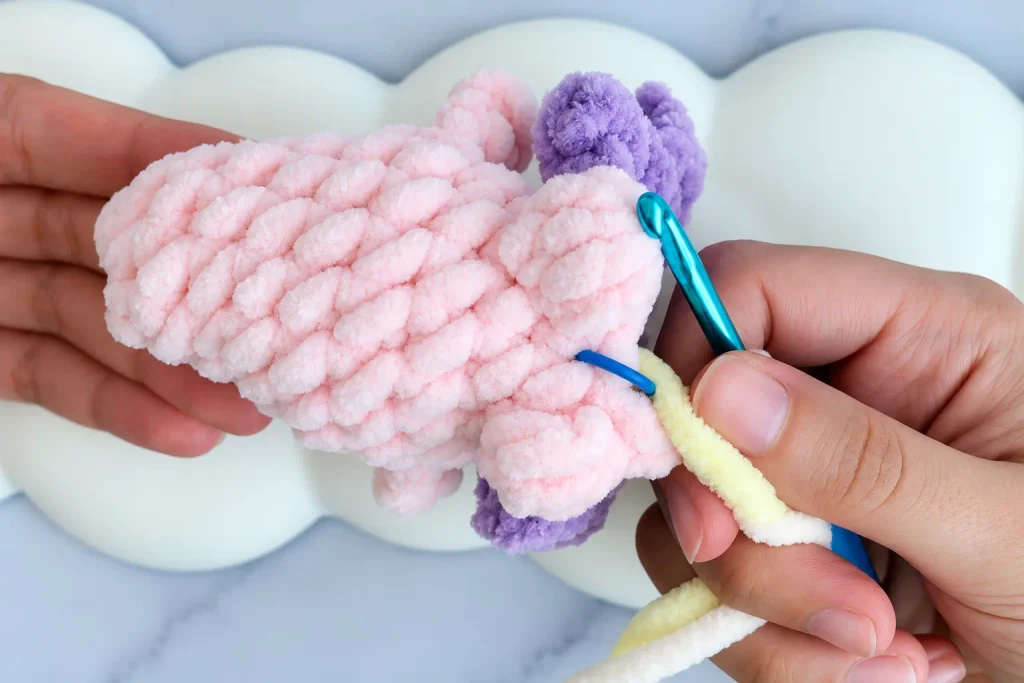
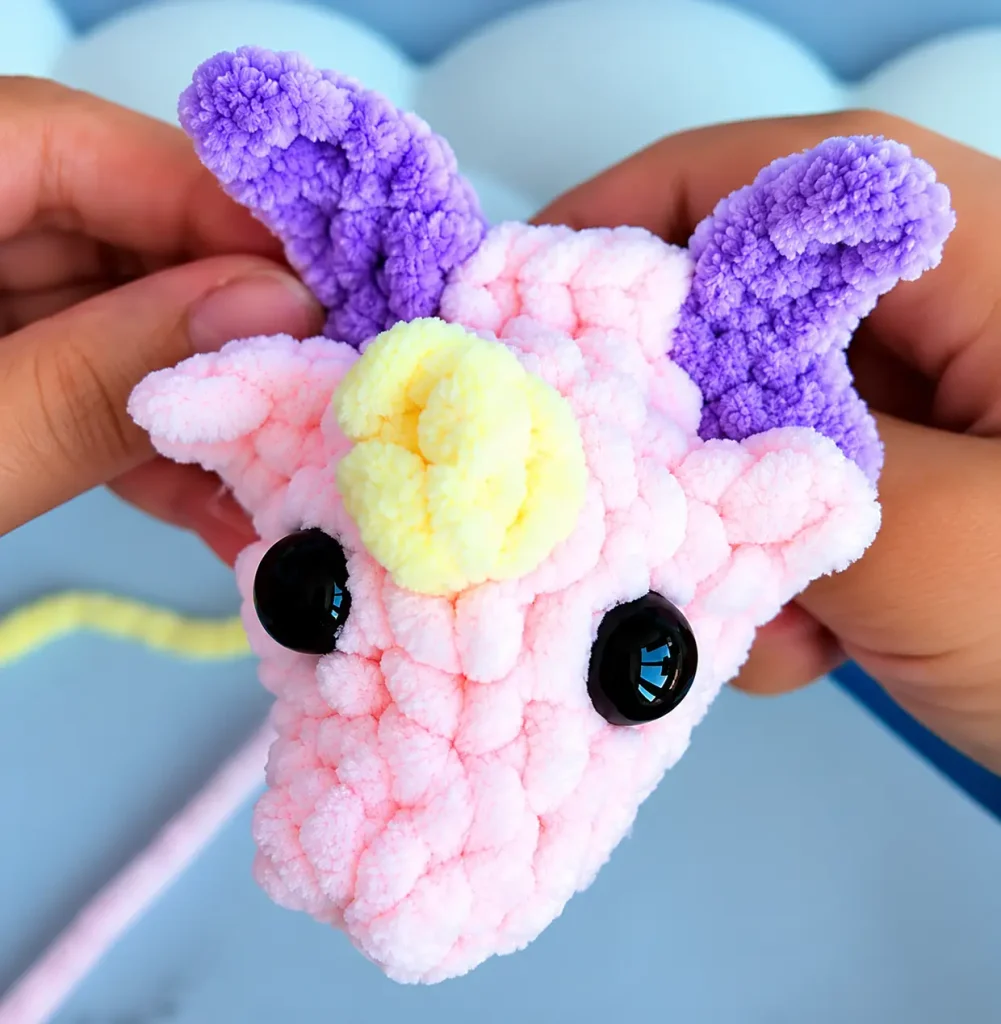
Check the positioning of both wings relative to the dragon’s face. The two wings use mirrored chain sequences to create a balanced appearance.
Once the second wing is complete, the purple yarn can be cut.
Important: How to Count the Wing Stitches
Although each wing contains multiple decorative stitches and chains, it occupies only one main-body stitch position. Count each completed wing as one position, then include the remaining single crochets and increases. Round 10 ends with 16 main-body stitch positions.
Before creating each wing, place a stitch marker in the unused back loop of its anchor stitch.
In Round 11, gently move the decorative wing stitches aside and work into the marked back loops behind the wings. Skip the decorative wing stitches and continue crocheting into the regular body stitches.
This technique allows both wings to be integrated directly into the dragon’s body without sewing them on separately.
Helpful Tip: Keep the two back-loop stitch markers in place until you have completed Round 11.
Round 11 – Continuing the Body
Round 11: 5 sc, 1 BLO sc, 2 sc, 1 dc, 2 sc, 1 BLO sc, 4 sc. [16]
Work each BLO sc into the marked back loop behind its corresponding wing.
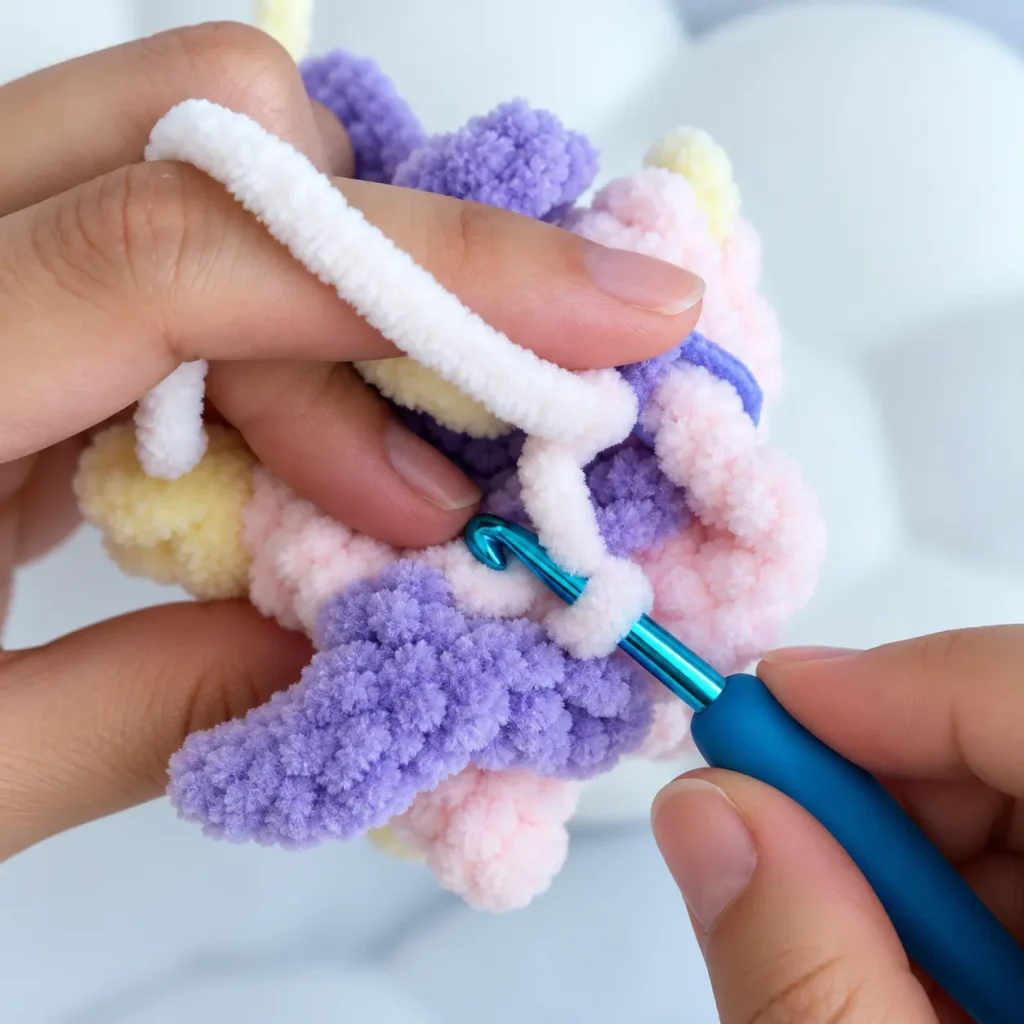
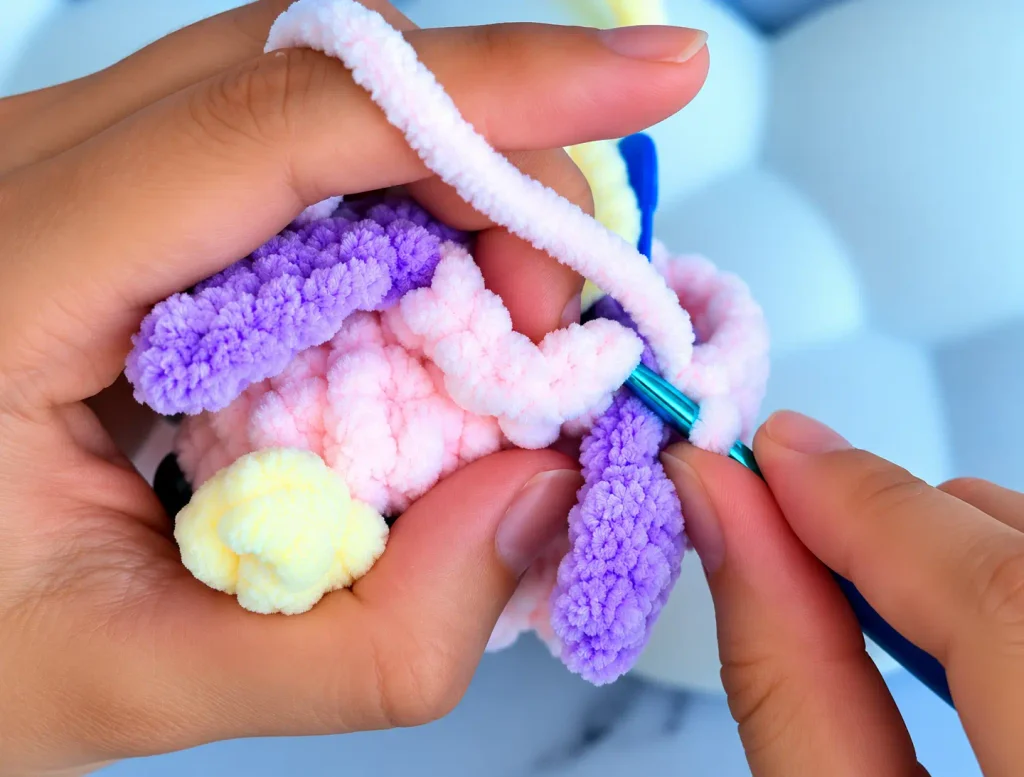
Change to yellow before working the double crochet that creates the first back spike, then return to pink before completing it.
Helpful Tip: Before continuing, check that the wings are evenly positioned and the first back spike aligns with the horn on the head. Small placement adjustments may be needed depending on your tension.
Part 3: Body & Back Spikes (Rounds 12–16)
Continue shaping the body while adding yellow spikes along the dragon’s back and raised bobble stitches that form the legs.
Remember that dc means double crochet, while dec means decrease. These two instructions serve different purposes in this section.
Round 12 – Adding a Back Spike
Round 12: 8 sc, 1 dc, 7 sc. [16]
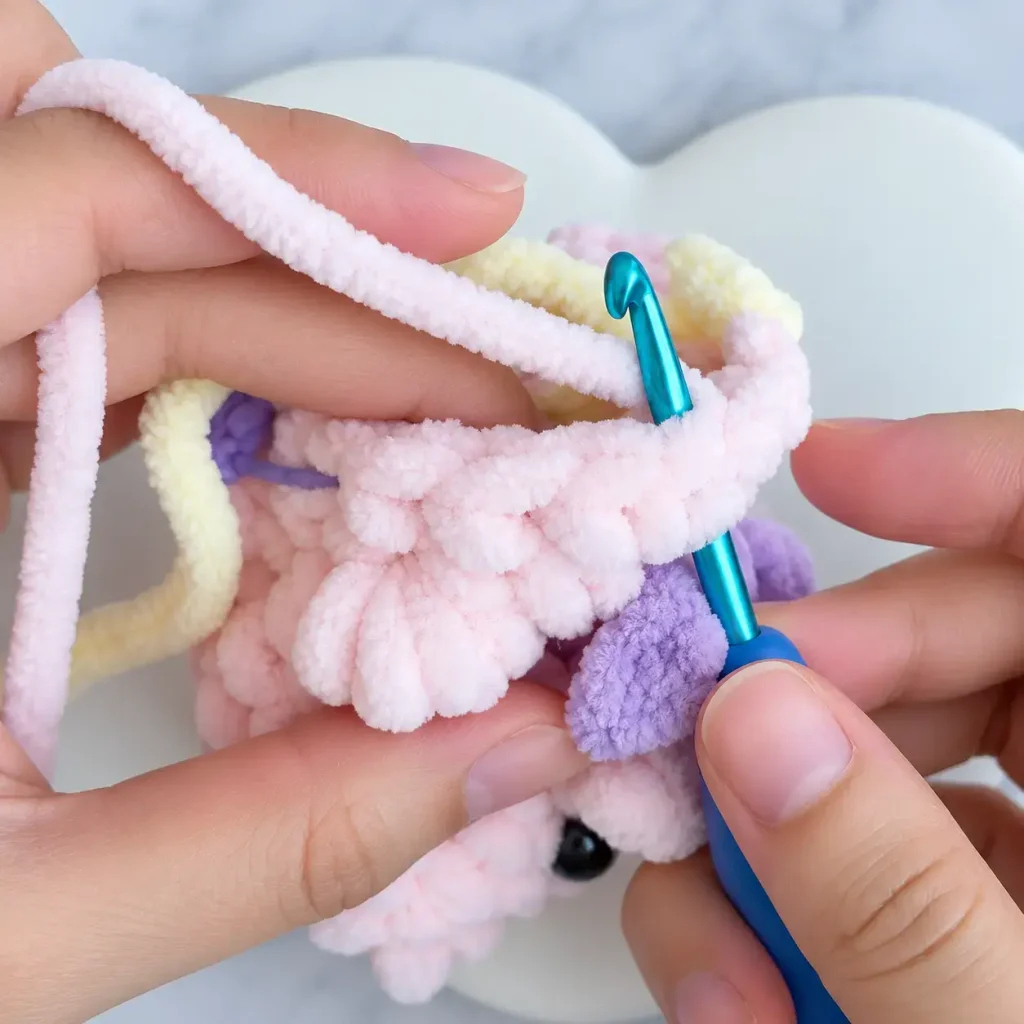
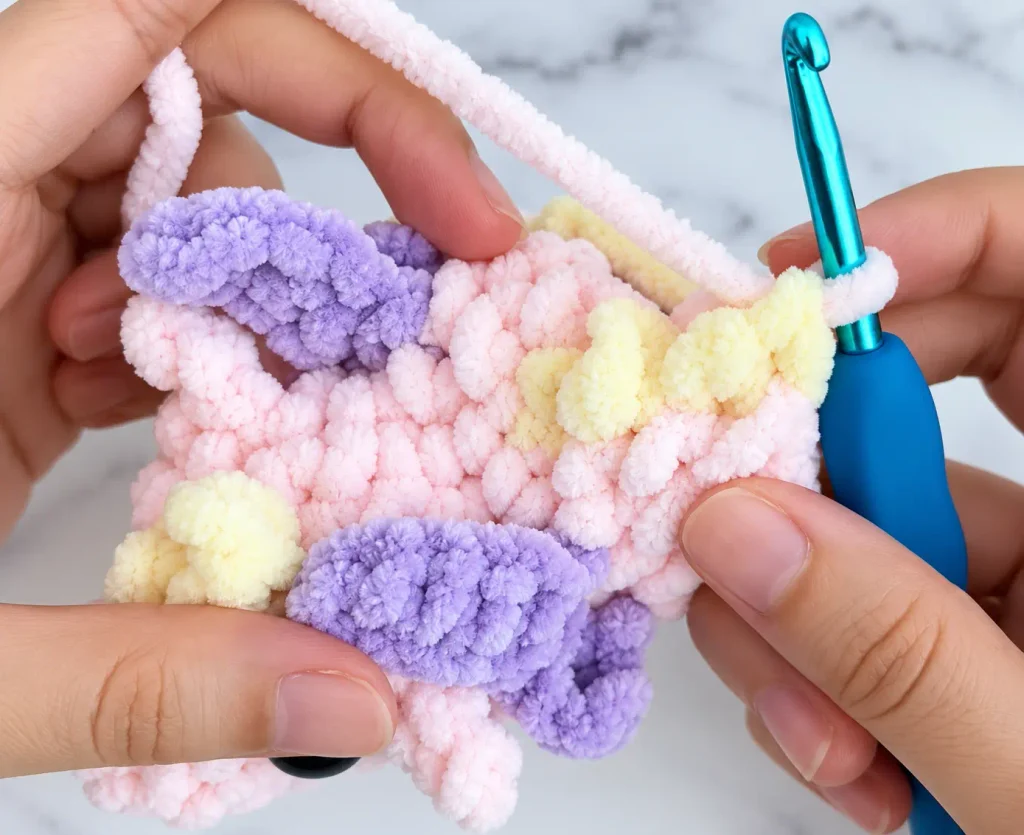
Change to yellow for the double crochet, then return to pink.
Keep the spike aligned with the previous decorative details along the back.
Round 13 – Back Spike and First Back Leg
Round 13: 8 sc, 1 dc, 6 sc, 1 BO. [16]
Use yellow for the double crochet and return to pink for the remaining stitches.
The bobble creates the first raised back-leg detail.
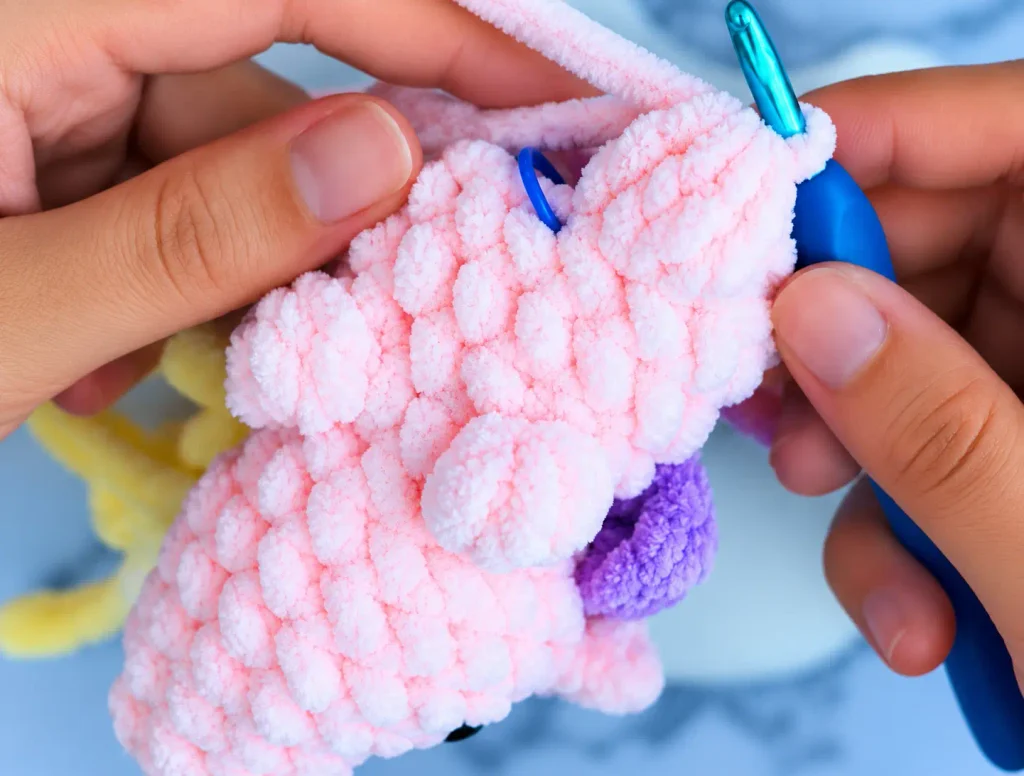
Check that it is positioned correctly relative to the existing features.
Round 14 – Second Back Leg
Round 14: 2 sc, 1 BO, 5 sc, 1 dc, 7 sc. [16]
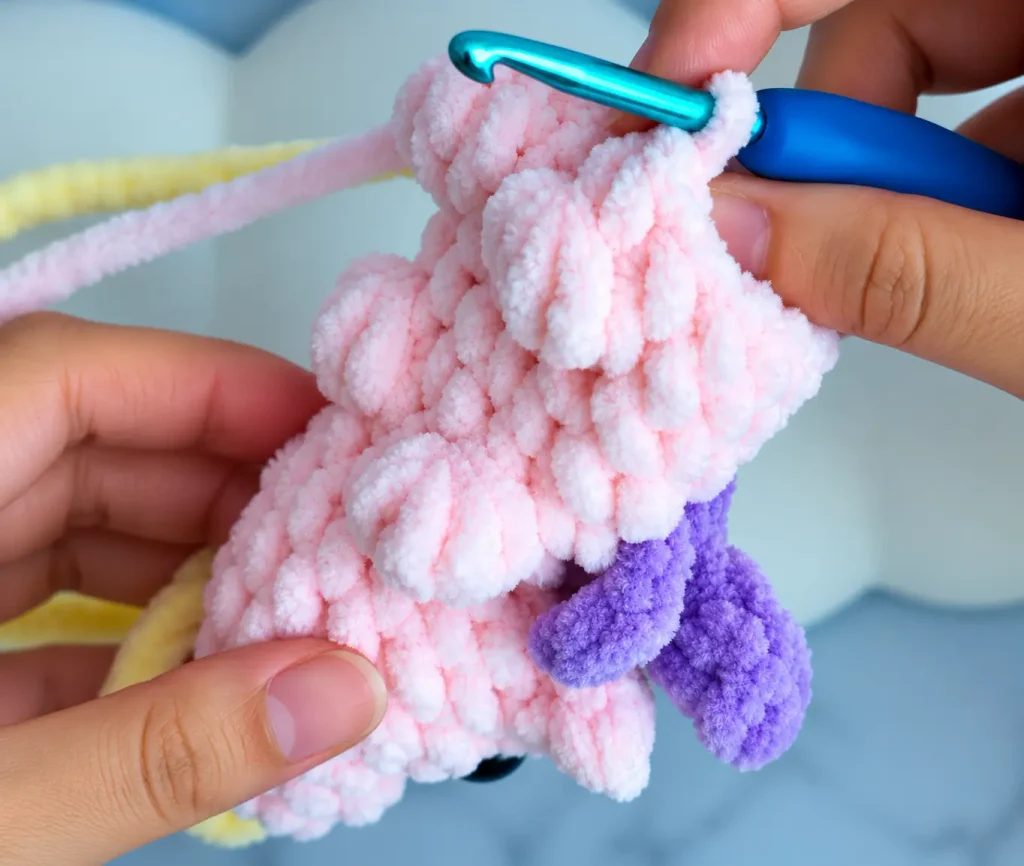
Work the bobble in pink.
Change to yellow for the double crochet spike, then return to pink.
Check that both back-leg bobbles are positioned evenly.
Round 15 – Narrowing the Body
Round 15: (2 sc, dec) × 2, 1 dc, 1 sc, dec, 2 sc, dec. [12]
During the second decrease of the repeated sequence, change to yellow before working the double crochet.
Change back to pink to continue the round.
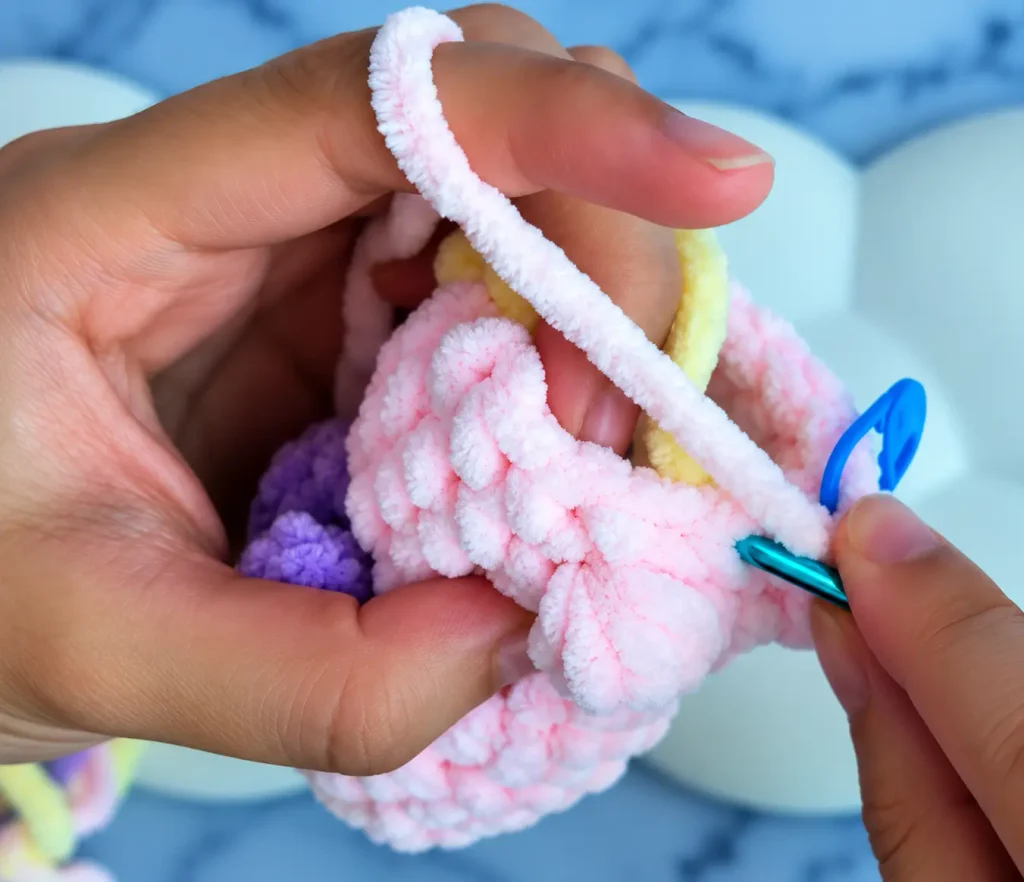
This round reduces the main body from 16 to 12 stitches while maintaining the decorative line of back spikes.
Stuffing the Body
Before starting Round 16, fill the body with polyester fiberfill.
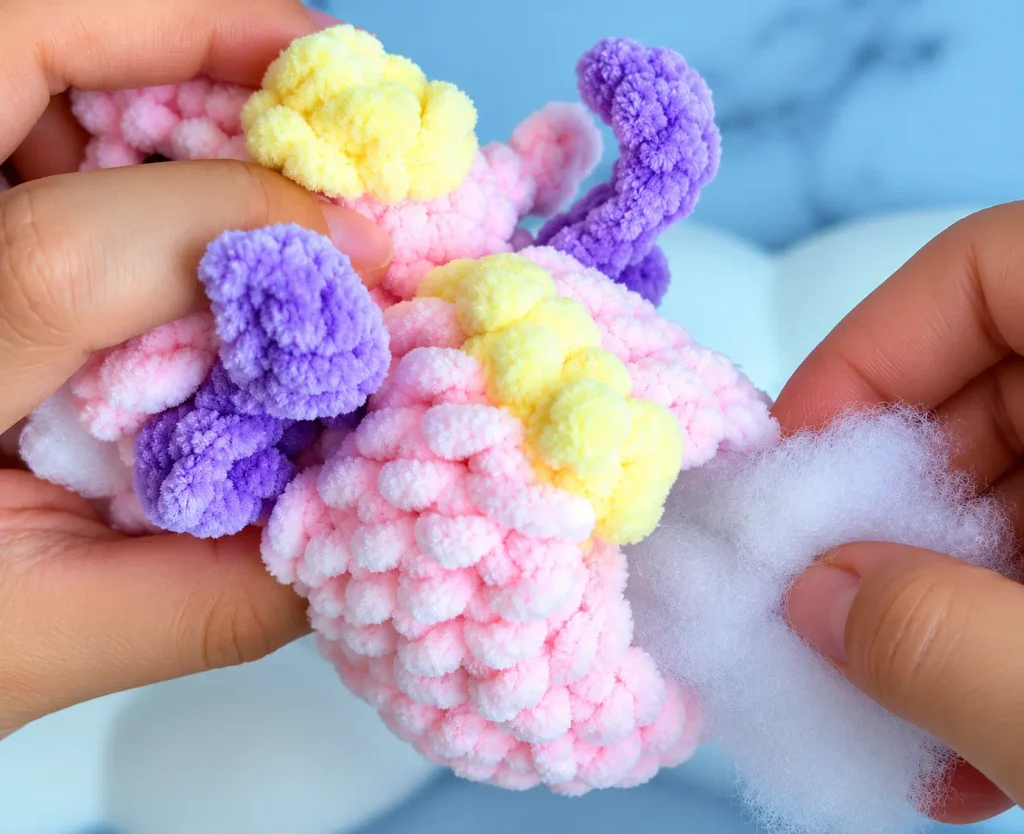
Distribute the stuffing around the rounded body and bobble-stitch legs. Avoid overstuffing so the fabric retains its shape without visible gaps.
Round 16 – Transitioning Into the Tail
Round 16: (sc, dec) × 2, 1 dc, dec, 1 sc, dec. [8]
Change to yellow during the second decrease of the repeated sequence, before working the double crochet.
Return to pink to complete the remaining stitches.
The decreases narrow the body to eight stitches, preparing the opening for the tail.
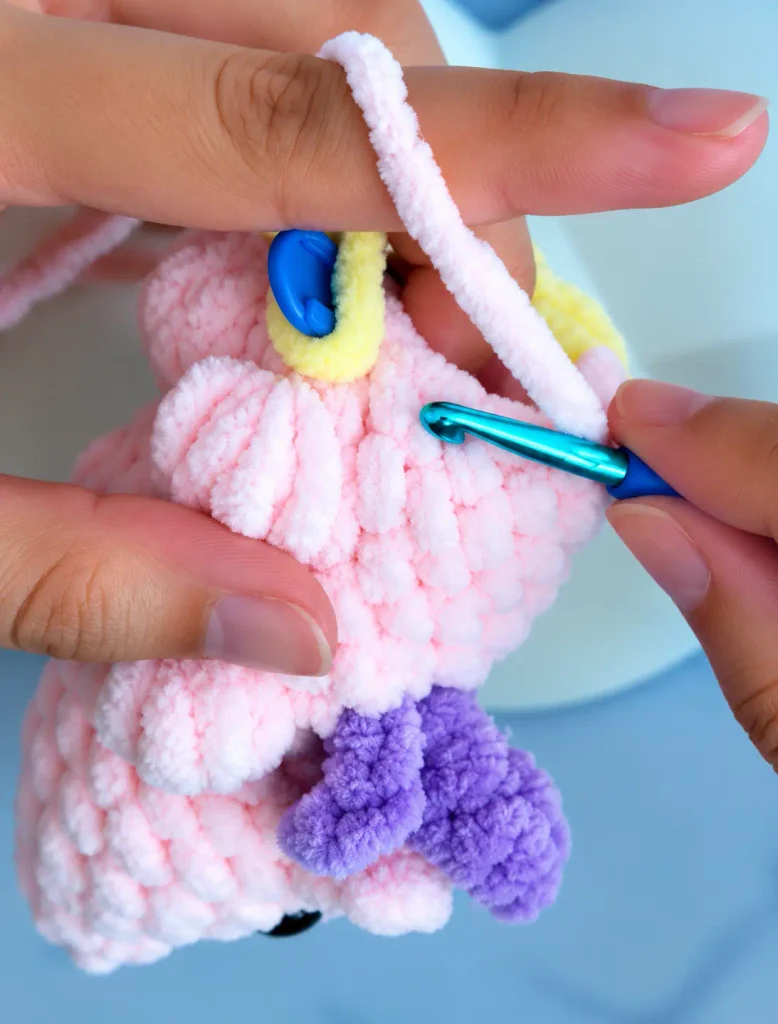
Helpful Tip: Check the alignment of each yellow spike before continuing. The original tutorial allows for small placement adjustments when the yarn, hook, or tension changes the positioning.
Part 4: Tail Shaping (Rounds 17–24)
The dragon’s tail is worked directly from the body. Gradual decreases create a tapered shape, while light stuffing keeps it flexible.
Continue with pink chenille yarn.
Rounds 17–18 – Beginning the Tail
Round 17: Sc in each stitch around. [8]
Round 18: Sc in each stitch around. [8]
These rounds establish the first narrow section of the tail.
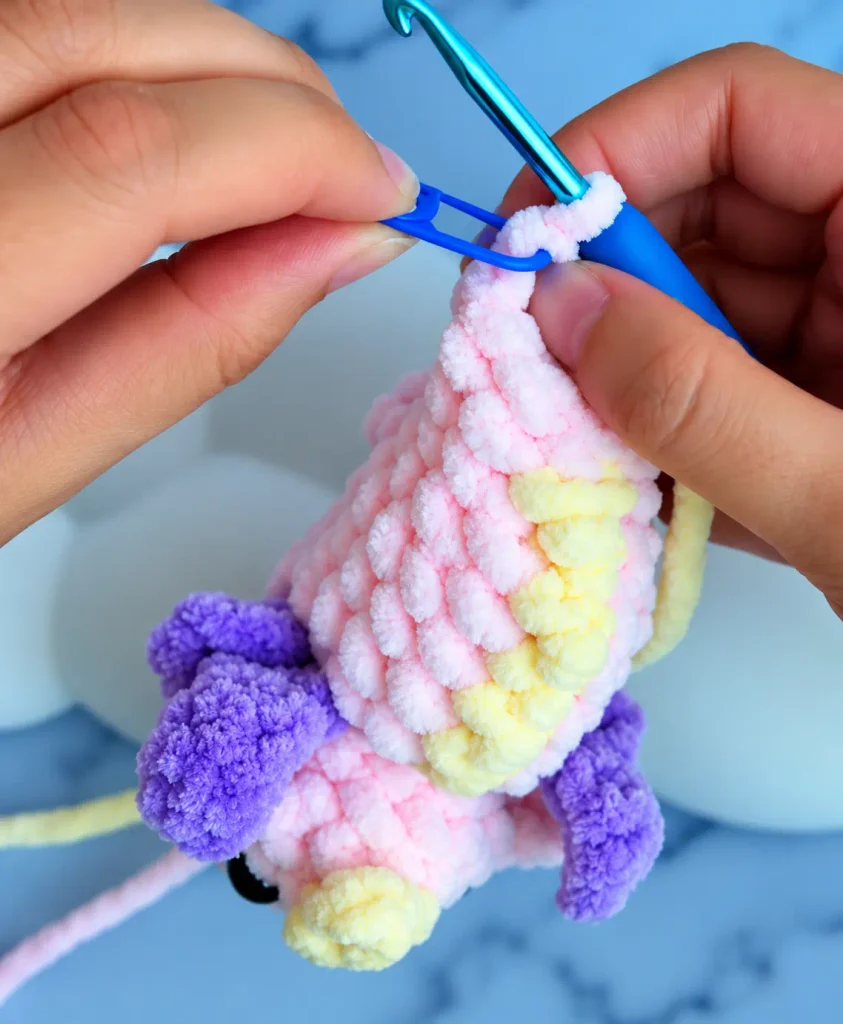
Round 19 – Adding Another Back Spike
Round 19: 4 sc, 1 dc, 3 sc. [8]
Change to yellow for the double crochet, then back to pink.
Keep the spike aligned with the previous yellow details.
Round 20 – Tapering the Tail
Round 20: (2 sc, dec) × 2. [6]
The tail narrows from eight to six stitches.
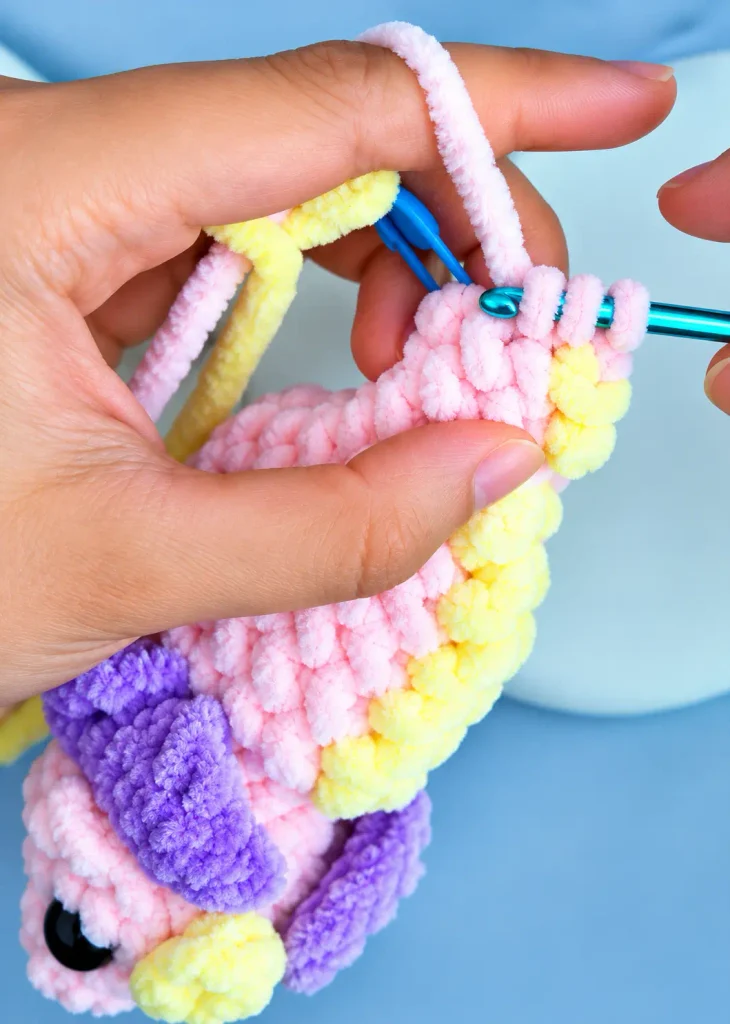
Add a small amount of stuffing at this stage. Keep the tail lightly filled so it can bend naturally.
Rounds 21–22 – Extending the Tail
Round 21: Sc in each stitch around. [6]
Round 22: Sc in each stitch around. [6]
Maintain even tension while crocheting these small rounds.
Round 23 – Narrowing the Tip
Round 23: (sc, dec) × 2. [4]
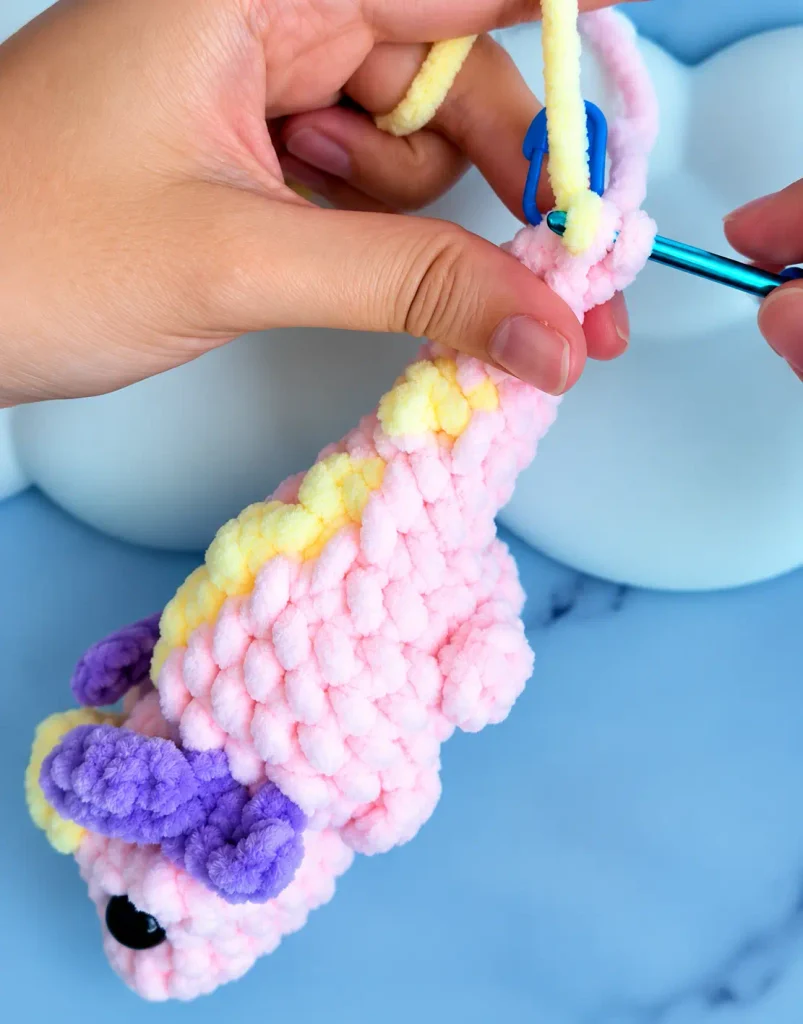
The opening now contains just four stitches.
Round 24 – Preparing for the Final Spikes
Round 24: Sc in each stitch around. [4]
Change to yellow while completing the last single crochet.
The tail is now ready for its final decorative spikes.
Helpful Tip: Avoid packing the tail too tightly with stuffing. A softly filled tail is easier to position and helps preserve the tapered shape.
Part 5: Final Tail Spikes & Finishing (Rounds 25–26)
The final two spikes are created directly into the tail tip. Once they are complete, only fastening off and hiding the yarn ends remain.
Round 25 – Creating the Tail-Tip Spikes
Continue with yellow yarn.
First Tail Spike
- Work 2 dc into the next stitch.
- Ch 2.
- Work another dc into the same stitch, changing to pink before completing it.
- Enlarge the working loop slightly and remove your hook.
- Insert the hook through the first dc.
- Catch the working loop and pull it through to form the spike.
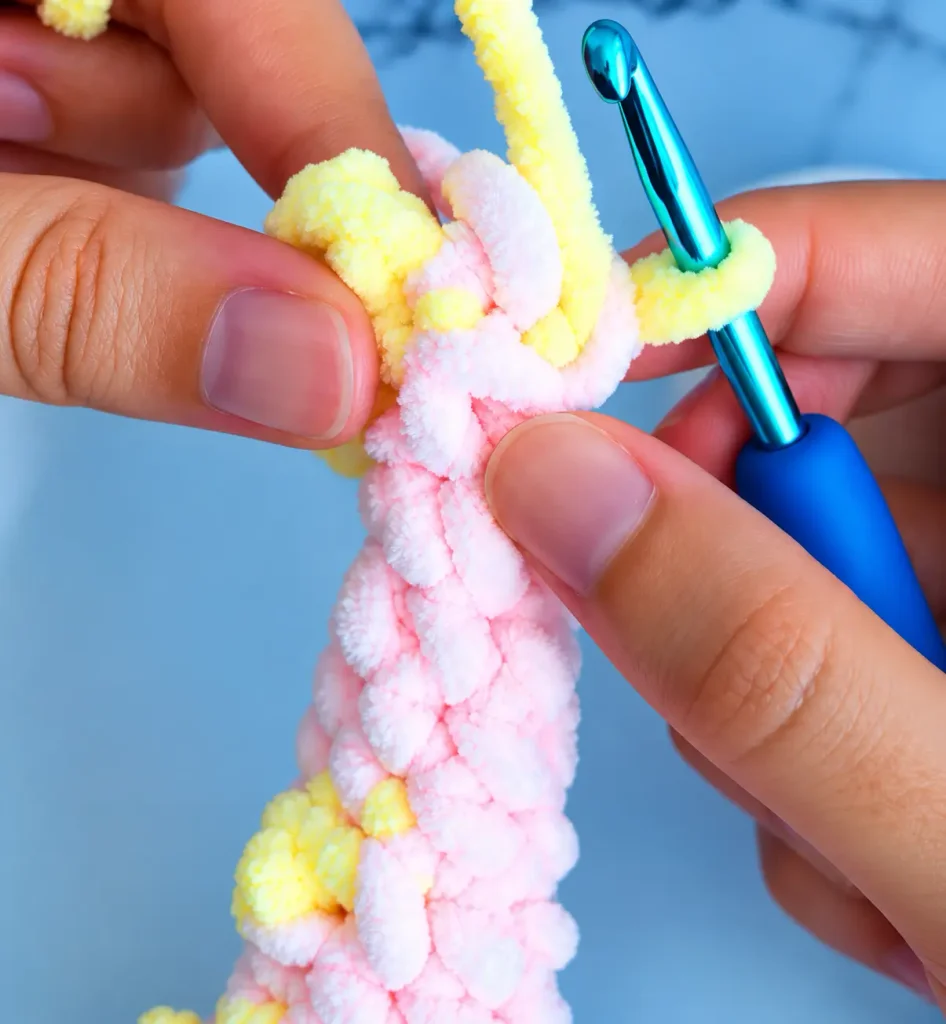
Work 2 sc along the main round.
During the second single crochet, change back to yellow.
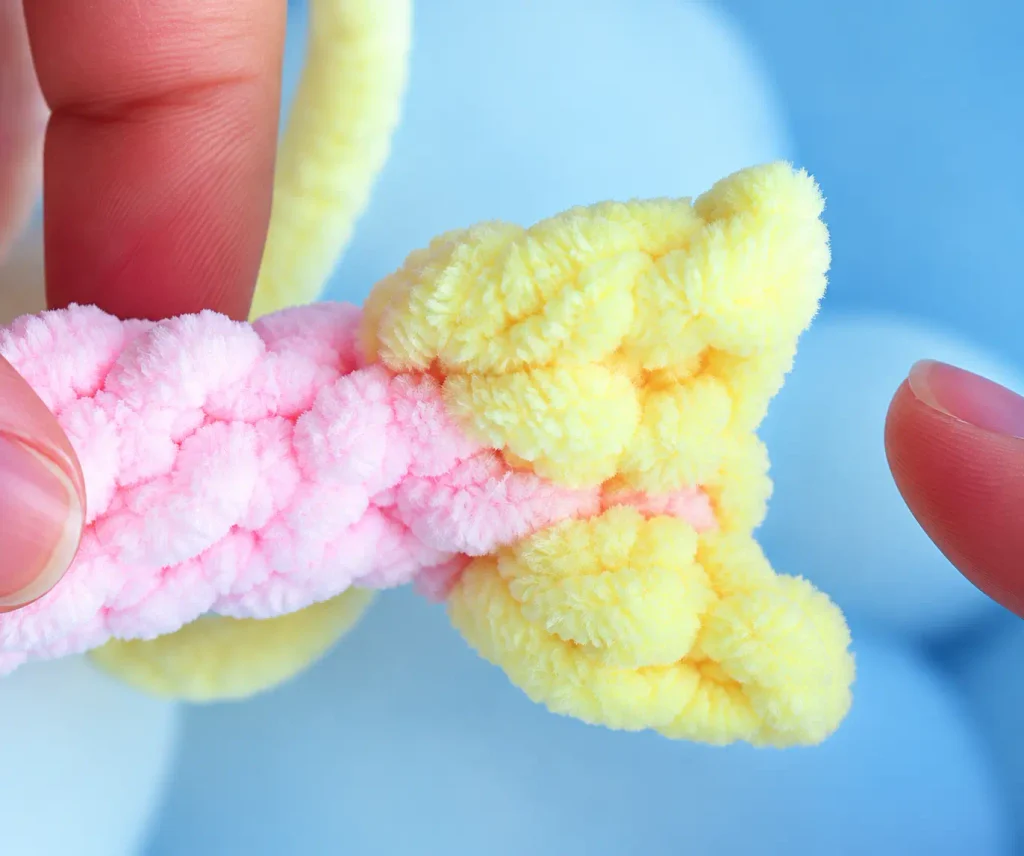
Second Tail Spike
- Work 2 dc into the final stitch.
- Ch 2.
- Work another dc into the same stitch.
- Enlarge the working loop and remove your hook.
- Insert the hook through the first dc.
- Catch the working loop and pull it through to complete the spike.
The two decorative spikes are now formed at the end of the tail.
Final Slip Stitch – Closing the Tail
Insert your hook into the first stitch of the main round and work 1 slip stitch (sl st).
If the first stitch is difficult to identify, the original tutorial demonstrates inserting the hook between the stitches beside the first spike.
This is a finishing step rather than a full additional round.
Fastening Off
Cut both yarn colors and fasten off.
Use a tapestry needle to carefully hide the remaining yarn ends inside the crocheted fabric.
Gently adjust the wings, ears, raised legs, spikes, and tail to create a balanced appearance.
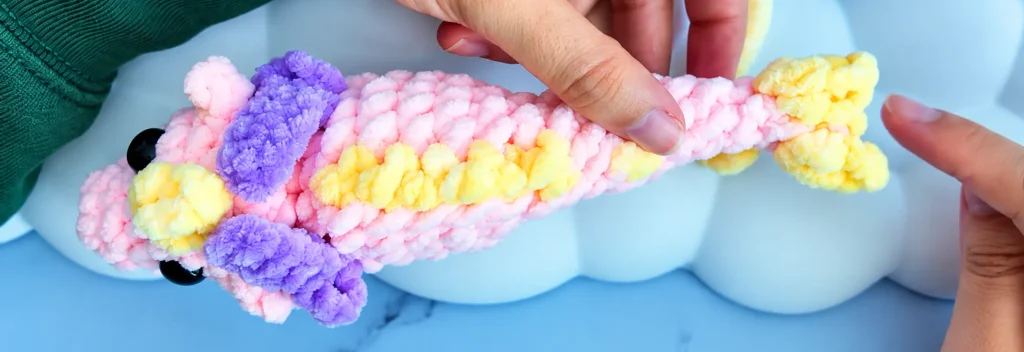
Your No-Sew Dragon Is Complete!
You now have a soft chenille dragon with integrated ears, wings, legs, decorative back spikes, and a flexible tail—all without sewing separate body parts together.
No-Sew Dragon Crochet Tips & Troubleshooting
When following this no-sew dragon crochet pattern, pay close attention to wing placement, stitch counts, and stuffing. The following solutions address five common issues that can affect the dragon’s final shape.
1. Why Are My Dragon Wings Uneven?
Problem: One wing sits higher or farther forward than the other.
Solution: Before continuing to Round 11, check that both wings are positioned evenly relative to the dragon’s face.
Each wing is made within a single main-body stitch position in Round 10. If the wings look uneven, double-check their placement and the surrounding stitches before moving on.
Tip: Compare both wings from the front and back while the stitches are still easy to access.
2. I Can’t Find the Back Loops Behind the Wings
Problem: The decorative wing stitches make it difficult to locate the correct loops for Round 11.
Solution: Before crocheting each wing, place a stitch marker in the unused back loop of its anchor stitch.
When you reach Round 11, gently move the wing aside and work the required single crochet into that marked back loop.
Tip: Do not remove the markers until you have completed both BLO stitches in Round 11.
3. My Back Spikes Are Not Aligned
Problem: The yellow spikes appear crooked or do not follow a straight line along the dragon’s back.
Solution: Check the position of each yellow double crochet before continuing with the next round.
The first back spike should align with the horn on the dragon’s head. If later spikes begin to shift, review your stitch counts and adjust their placement where necessary.
Tip: Look at the dragon from above after each spike to check the alignment.
4. My Dragon’s Legs Look Uneven
Problem: The raised bobble stitches that form the legs are not positioned symmetrically.
Solution: Check the placement of the bobble stitches in Rounds 9, 10, 13, and 14.
Before continuing past Round 14, compare the back-leg bobbles with the front-leg details. If they do not line up, recheck the stitch positions and make any needed adjustment before completing the following rounds.
Tip: Use the face and wings as reference points when checking the position of the legs.
5. My Dragon’s Tail Is Too Stiff
Problem: The tail does not bend naturally or looks bulky.
Solution: Use only a small amount of polyester fiberfill in the tail.
The tail is designed to be lightly stuffed so it remains flexible. Add stuffing gradually rather than filling it as firmly as the head or body.
Tip: Gently shape the tail with your fingers as you work through the final rounds.
Free Crochet Dragon Pattern FAQs
Here are answers to common questions about yarn choices, sizing, and customizing this dragon crochet pattern.
Is this no-sew dragon pattern beginner-friendly?
This pattern is best for advanced beginners who are familiar with single crochet, increases, decreases, and color changes. The most challenging part is creating the wings directly into the body during Round 10.
Can I use a different yarn for this dragon?
Yes. You can substitute another yarn weight for the super bulky chenille used in the tutorial. Choose a compatible crochet hook and maintain tight, even stitches so the stuffing stays inside. Different yarn weights will also change the finished dragon’s size.
How big will my finished crochet dragon be?
The tutorial doesn’t provide exact finished measurements. The size depends on your yarn thickness, crochet hook, and tension.
Can I make this dragon without safety eyes?
Yes. You can embroider the eyes with yarn instead of using plastic safety eyes. This avoids detachable plastic eye components, which can present a choking hazard to young children.